Pages

Thursday, October 30, 2008

Was there life before?

I just came back from The Old Foodie and after having read "...a pounde or a halfe of suger, and myngle all those together over the fyre, till thyme they seethe, and then set it to cole...." Iwas reminded of how young I am. Thank god we have spelling checks these days.

However, I do have a history. And I would like to share it with you. Look at this :


Yes they are old aren't they? So old that it's verging on hilarity. These were/are my collection of recipes that I have kept for an unsaid number of years.

Just in case you were wondering : No, I'm not fraying around the edges nor do I look as helpless as those there things. But they are mine nevertheless. They are my precious hard-copies, touchable and age-able, of recipes that I had collected just for the sake of collecting. May I add too that I'm not particularly careful with my property so they actually age before their time. Snigger. So in no way should you equate from the way my property looks to the way I look. Really. Jokes aside. I insist. Swear to god.

That was life before blogging. That was life before friends and people were invisible and untouchable. That was life before, when the skills of typing were limited to typists or secretaries only. That was life at a time when you attended typing school while waiting for your A level results just in case you didn't make it beyond that point, deliberately or otherwise.

Most of the recipes that were collected were cut out from newspapers and women's magazines like Her World and Female or Wanita and so on and so forth. It was a preoccupation that did not necessarily include cooking. it was just the basic act of cutting, or copying in longhand and/or pasting with gum or sticky-tape that made the activity worthwhile and queerly satisfying. Most of the time I would be flipping those pages and admiring the collection that I had amassed and occasionally I would try out a recipe or two.

Apart from the cookery books that I also collected, of which some are as horrifyingly old as my children, cutting and pasting scraps of recipes was a normal preoccupation of us medieval women who had an interest in cooking or baking. Tips and recipes were also gleaned from friends, acquaintances and old folks. What I mean is, from actual and visibly embodied people, whom you could touch, see, smell and irritate where the only way of deleting them from your life was by deleting theirs.

But, thanks to the internet and blogging, things have changed. Incredibly so. There are people now to whom I talk, joke and laugh with but whom I have not met and have not compared heights/weights/figure/clothes/shoes(age of shoes) or meals with. It is incredible. It is phenomenal. Unfortunately there are also people whom I used to joke, talk, laugh and eat with but whom I don't meet, talk, joke or laugh with anymore. It is disgusting and shameful. The act I mean. The act of not meeting I mean.

But let not my aghast at technological advancement disturb you. I have advanced along with it more than comfortably so and bloggerin' on to such a stage that it would take a crane, Hulk Hogan, Arnold Swazzernager or a chain saw to pry me away from the laptop/keyboard/mouse and all other paraphernalia associated with blogging. It has gotten to such a stage that my children despise me, that I would claw at the keyboard if it was taken away from me,that I would wail and moan and rant if the computer broke down or was just excruciatingly s-l-o-w.

So I wonder now whether this is all worth my time and energy or what's left of it. Is it worth growing roots and getting attached to this here dining chair in the name of blogging? Is it worth being permanently disabled with an act that eats up your brains 24/7 and losing the sight of sun and moon? Is it worth the threat of blindness, back pain and an expanding bottom over blogging?

I can't quite decide yet. I'm in the midst of searching for the answers to my life and the worth of it. I'm in the midst of blogging. But when I get them I'll let you know. In the meantime I'll put away those dinosaur-recipe collection and carry on living in my impalpable, virtual world.

Wednesday, October 29, 2008

Black Pepper Beef


I LOVE black pepper anything. And I am glad that I am finally able to cook a good black pepper dish without using oyster sauce. Not that I have anything against it in taste. I love the flavour and the richness and the sweetness that it brings to a dish but unfortunately I have heard that it contains anything but oysters.

So to compensate I used a combination of honey and a dark, thick soy sauce. It worked and everyone was slappy happy although not the violent kind.

But it was difficult to get a good picture though. Black and dark dishes like this and rendang just don't photograph well. At least that was what I experienced. I must have taken about fifty frames and most of them were bad. But thank god for digitals. Thank god for delete too. And thank god for one decent one. Or two.

Black Pepper Beef

500 gm beef fillet, sliced thinly

marinate for beef :

2 teaspn light soy sauce
1 teaspn sugar
1 teaspn cornflour
1/2 teaspn bicarbonate of soda
1/2 teaspn salt
1 egg ( white only if preferred)

3 cloves garlic crushed to a paste
About 4 tablespn dark soy sauce
1-2 tablespn honey
1-2 tablespoon ground black pepper
1 teaspoon cornflour + 1 tablespoon water, mixed
some water

Marinate the beef for at least 30 minutes. Coat the beef with the marinate well by using your fingers so that every slice is well coated.

Heat 3 or 4 tablespoon spf oil in a small wok. Fry the beef pieces in three batches until browned but half cooked through. Drain and keep aside.

Heat a tablespoon of oil in a larger pan. Saute the garlic paste for a few seconds. Add the soy sauce, honey, and some water, perhaps about 1/2 a cup of water. Stir. Add ground black pepper and then beef slices all at once. Put heat on high and mix well until beef slices are coated with the sauce. Add salt to taste if necessary (I did not add salt) and if you would like more sauce just add a little more water. When the beef is about done maybe three ot five minutes add the cornflour mixture to thicken the sauce. Sprinkle a little black pepper on top if you like.

Serve with white rice or noodles.


TIP : Bicarbonate of soda tenderizes the meat. Check this out for some opinions on tenderizing meat and this for some expert opinion on the effects of marinated meat on health.

TIP : The egg that was used as part of the marinade seemed to give the beef a tender quality too. As well as adding moistness to it.

Fish in a Tumeric Soup


This dish started out as a dish that I had learnt from my late mother-in-law. She used to cook an amazingly simple fish soup called Lakbuk. Being a Suluk who were originally a sea-faring people, from Southern Phillipines, cooking was done on boats while out at sea. The dishes that were borne from such a life were simple and spartan in the use of ingredients. No oil was used and to cut a long recipe short the fish that they caught from the sea went straight into a pot and were boiled with some salt, bird chillies, lemon grass, some spurts of lime juice and a few slices of onions.

I couldn't quite appreciate the soup that she made at first because I found it a little too bland, albeit extremely healthy, but eventually it grew on me not forgetting the fact that my husband hungered for it on a daily basis during the early years of our marraige.

Sometimes, however, I noticed that she (my late MIL) would use fresh tumeric and sometimes I noticed that she would saute the onions, ginger and if my late Father in law wasn't looking, she would, with a long sideward glance, throw in a couple of cloves of crushed garlic before she added the water. This confused me.

Being in a constantly bewildered and confused state at the time anyway, as a result of being in a constantly semi-conscious state of existence as a young person in my early twenties, who couldn't quite yet decide whether the big bad world of adulthood was the wisest thing to get into at all, that little deviation by my mother in law did not help. Over the years I never realised that the fish soup that I have been dishing up for my husband was actually not the fish soup original as per my mother in law as per sea-faring Suluks.

I had been adulterating it to my own taste. Unconsciously. And this is the adulterated version that I am going to present to you. The reason that I do this is because when my late father in law came to stay with us for a week, at one time, I cooked it and he actually loved it. And I love it too.

600 gm of red snapper, cut into slices
1/2 a large onion or 3 shallots
4 -5 slices of ginger
1 clove of garlic
a knob of fresh tumeric

a tumeric leaf, left whole
1 lemon grass, crushed
a couple of crushed bird chillies

Tamarind juice from a teaspoon of tammarind pulp or a slice of dried asam gelugor(which I actually prefer and for which I will get the English translation when I get it)

Pound the onions, ginger, garlic and tumeric to a paste in a pestle and mortar or in a mortar and pestle, whichever came first (I never can remember which is the correct one). Clean the pieces of fish and pat dry (not that I do that but it just sounds right in a recipe).

Saute the pounded paste, crushed lemon grass and tumeric leaf in a tablespoon of oil until fragrant then add 2 cups of water, the tamamrind juice or the slice of asam gelugor, salt and bring it ot a boil. Put in the fish and bring the soup to a gentle simmer. Add more water if necessary and adjust salt to taste. Add bird chillies at this point if you like.

Simmer until the fish is cooked through and flakes easily. Slurp and enjoy with plain white rice and veggies for a very healthy meal.

Tuesday, October 28, 2008

Flapjacks


When you have run out of flour or eggs you could try making flapjacks. But of course you'll have to have baby oats, brown sugar and some butter. It's the easiest thing to do for a quick snack and quite delicious.

The original recipe was way too sweet and used demerara sugar which is not the easiest thing to find in a supermarket (organic stores have them though) so I sub'd with soft brown sugar instead. It worked well.

10 ozs baby oats
6 ozs soft brown sugar
6 ozs butter

Mix oats and sugar in a bowl. Add a pinch of salt. Melt the butter in a small pot and then pour it into the oats-sugar mixture. Mix well until all dry ingredients are coated with the melted butter. Line an 11" by 8" pan with non stick silicone or baking paper. Pour the oats mixture into the lined baking pan and press down with the back of a spoon, packing the mixture into a compact, fairly thin and even layer. Bake at 180 C for 15 to 20 minutes. Cut into rectangles or squares while still warm and a little soft.

TIP : Do not used rolled oats or jumbo oats. It will just end up in crumbs when you try to cut it.

TIP : Make sure you cut it while still warm otherwise you might as well just eat it as an 8 by 11 inch sized biscuit.

Self Serve Sandwich Toast


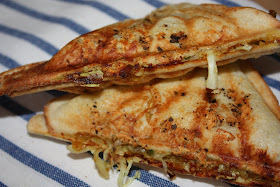
Lazy days are happy days. Everyone is out and nobody's coming home for lunch. :D. Unfortunately I still have to prepare something because I have this darn blog to feed. I scrummaged in my fridge/kitchen and I found that I did not have any flour to make cakes or cookies with but I did have the curry chicken filling left over from the curry puffs that I made two weeks ago (I freezed the filling and took it out to defrost). I had a can of tuna, mayo, onions, left over roast, some almost wilted clelery, green chillies from the Thai green curry and the rest, they say, is easy peasy.

I came up with three kinds of filling for sandwiches but the best part is that each person has to make a sandwich himself. And since I was the only person around that of course meant me.

I sliced the roast. I stared at the curry puff chicken and potatoes filling. And I made the tuna filling.

Tuna filling:
1 can of 185 gm flaked tuna in oil or water, drained
3 - 4 teaspn of mayo
salt and pepper

Blitz them all in a food processor and adjust for taste. Blitz until the mixture is fine and smooth that you could spread it with a knife like it was butter. For some reason it tastes so good this way that everybody thinks I had put something really special in it and they keep (annoyingly) asking me to make some more. In truth, that is all there is to it. Swear to God. Perhaps it is just the fact that it is blitzed to a paste that makes it taste good rather than mixing the tuna and mayo roughly with a spoon. I mean it is really good, but you will have to blitz it.


Now that the fillings are done slice some cabbage, celery, onions, chillies and whatever else that you have finely.


Pile everything that you like up on a slice of bread of choice, buttered or not buttered, sprinkle a little shredded cheddar cheese on the top and of course finish it off with another slice of bread. Butter the sandwich on the outside and swipe a mixture of garlic paste and black pepper on the outside top slice of bread and on the outside bottom sliced bread too of you like.


Toast in a sandwich toaster until golden brown.

Eat. That was my lunch and it was pretty good for a bloggered one.

Monday, October 27, 2008

A Bottle of Honey

Haven't we all been perplexed, crippled and thwarted by that cone-shaped bottle of honey? Yes, plain old honey. In a bottle with the pointed tip. That you can't keep in the fridge ( for fear of it solidifying),that you can't keep on a Malaysian kitchen table (for fear of ants), that you don't want to bother to let it sit in a bowl of water to outsmart those ants and that you don't want to bother to cover the tip with a piece of foil to outsmart other bothersome beings like impregnated flies. So what do we do?

Let me not tell you the things that I have done to get that honey out (after refrigerating it). I have soaked the bottle in warm/hot water until the honey, along with the bottle, liquified (which took forever), I have struggled with the feat of making the bottle stand upside down, on its tip, on its own, hands free, for at least fifteen minutes or, out of frustration, I have wrung the bottle and then asked to be resuscitated afterwards from the effort of it all, and sometimes, just sometimes, I begin to wonder if I was, after all, just a stupid cow.

However, after having had one of my sons go to the mini market to get a bottle of honey for the pancakes that I was making for them, he came home with a bottle of honey that I found, after some pain, to be worthy of some blogological dissertation..

It's not the honey that I'm going to tell you about though but the bottle. It was actually labeled upside down. My first thought was how could any respectable manufacturing company have labeled their bottles up side down only to have it exported and have them sit on the shelves all around the world? So silly. I smirked.

But I took a second look and then out of itchy hands (gatal tangan) I turned it the 'right way up'. At least, what seemed the right way up, that is with the label the right way up. When I had done that I found that there was no opening on the 'top'. So I sat there staring at the bottle's bottom but with the label the right way up all the way. Oh God! this calls for some serious use of brain power.

In the meantime I took some pictures thinking that I might have stumbled upon the opportunity to win fifty ringgit from Star for strange, amusing and incomprehensible situations. Plus an evil opportunity to put CAPILANO HONEY LIMITED to shame and out of business.

However, still determined and hopeful to put things right, I turned it 'upside down' again, that is, with the label the wrong way up, with the bottom end at the bottom and the capped end at the top. Then I did the unthinkable. I flipped the cap open and peered inside. I snapped off the little thingy that sealed the opening and scrutinized further.

Ah..... discovery of the century and science at its most useful stared back smack into my flabbergasted face.

The opening was covered with a translucent and concave shield with an X cut across it. That, my dear Watson, was why the bottle was 'upside down' or that 'right side up' was actually the 'wrong side up'.

That little concave screen, with the X cut across it, allowed you to keep it 'upside down' or the 'right side up' (frankly in this here discussion it doesn't matter so long everything is put in inverted commas) for the easy flow of honey when you squeeze the bottle but at the same time it prevents the honey from leaking out when you don't squeeze the bottle inspite of the pressure from the weight of the honey when the bottle is 'upside down'. Why?

Well, the cross does not activate and open up unless the bottle is squeezed (meaning when extra pressure is exerted) and because of its concave shape, or convex shape if you are inside the bottle, it does not give way under all that pressure and therefore remains closed and seals off the opening so long the bottle is not squeezed(that is when there is no extra pressure being exerted).

I rest my case.

However, being the visionary that I am, I have taken pictures of this here bottle of honey so that those of you out there, who are still in an ignoramus state of mind like I was some seconds ago, will not have to go through the puzzling pain, the obtuse scrutiny and whimsical wonderment that I had to go through.

You're welcome.


Sunday, October 26, 2008

Preeta Samarasan - Evening is the Whole Day


Apparently point and shoot cameras need some amount of skill too. Here, there's an obvious lack of it.

This is not a food post but I thought it would be an interesting post anyway. It's not everyday that you get to meet a successful writer of international acclaim. This young lady is Preeta Samarasan. Her book Evening is the Whole Day is her first novel and a very successful one. I had attended the MPH Mid-Valley's monthly Lit Addict's Meet.

Unfortunately, I had gone there without reading her novel which I am sure must have disappointed her some. But I have a signed copy now and a good read tonight. My intention though of attending the discussion was not to talk about the book but rather to talk with her. I had a feeling that the gentleman next to me, whom I believe had arranged the meeting, was a little contemptuous that I had the cheek to attend the meet without reading the book beforehand. I sensed that he ticked me off a little, quite subtly. LOL

But really, I did read a synopsis of the book, we were not about to attend a lecture, nor about to sit for a quiz, so I did not think that we had to prepare ourselves like a bunch of school kids, apart from the fact that life gets in the way very often lately. I have read too some very good reviews of her book and that was enough to make me grab the opportunity to meet her apart from the fact that I was much more interested in the writer and the trials and tribulations that she may have experienced during the writing process.. (Okay, okay, having given all those excuses I have to admit that I did feel a little guilty anyway).

Preeta is a Malaysian now living in France with her equally young husband. She seemed a little nervous, but who wouldn't be, dealing with such success at such a young age. Someone asked her how she would like to be remembered and I recall Preeta being more than a little tickled, feeling perhaps the implication of 'agedness', if there is such a word, by such a question or perhaps just a little humbly embarrassed that she should be asked such. I can't recall her answer though. What I do remember was, her saying, "I'm not that old!" with laughter attached.

I did find out though that the novel had started out with just three characters (as in people not alphabets). That was in 1999 and at the time Preeta said that she had no idea where the story would be heading. She did not have an outline let alone any idea of how the story would end. Apparently she had started on the novel by writing in longhand and had never imagined that the completed novel would finally be written in reverse order. I haven't read the book but I will write a review once I have.

Her writing has been described as rich, quirky and colourful in prose of acrobatic grace. It is a novel of a "vibrant cast of characters" and "of a family struggling to deal with its past" during a time of the crazy uncertainty of a country coming to terms with itself. She writes of the strains and clashes in a country where the different races "vie for their positions in society". Fortunately she has not had any problem of censorship by the Malaysian censorship board because, as someone there was saying, "Malaysians don't read". Most favoured joke on Malaysians by Malaysians who do or think they do.

There were five of us sitting at the table. My son and I, Preeta, the gentleman next to me, and a young lady across from me until Preeta's husband came along and another lady most probably an MPH staff. It surprised me that it was such a small group. I was imagining that the whole book cafe would be used up for the event. I suppose Malaysians really don't read. But the rest of the large MPH store were quite thronged with people. So I'm quite confused to say the least.

Preeta says that she has a very good memory for the unnecessary things, like all the details of a conversation or the colour of someone's baggage perhaps but a bad memory for necessary ones like bills and appointments. Her husband confirmed her claim good-naturedly and lovingly. If this was a perfect world many of us, I am sure, would have had such a claim for ourselves confirmed good-naturedly too. Unfortunately, as mere mortals, we do not live in a perfect world as they do. Such is the world of writers. Successful ones I mean.

My son asked if she wrote for the money. No, that was never her motivation. But she's making some anyway. How convenient.

"Ooops now where did I put the car keys??!! Oh no!...the lights have gone off! Darn! I forgot to pay the electricity bill! Gosh.. I must get the pair of red heels that the young woman in the purple striped t-shirt with yellow hotpants was weraing at Friday's two months and three days ago!".

Hmm... come to think of it I must get that book completed too. Not that I need the money.

It was Ayamas black pepper chicken for dinner tonight. Yay no cooking! Thanks to Preeta.

Saturday, October 25, 2008

Tuna and Potato Croquettes


Some of you might remember the 5 potatoes I boiled and abandoned one morning not very long ago. Exactly five posts ago if you care to know. Well it did not go to waste because after leaving them to hibernate in the fridge for two days I made them into croquettes with tuna, chopped coriander, mayo and lemon juice. We had it for dinner with the Thai green curry I whipped up just now.

The children cleaned the platter and I'm a satisfied mother, cook and blogger. Husband doesn't fancy this kind of play food. He dug into the Thai green curry though.

5 medium or 3 large potatoes (about 500 gm)
185 gm can of flaked tuna in oil or water
3 - 4 Tablespn of mayonnaise
1 tsp cumin powder
1-2 tsp ground black pepper
1/4 cup chopped coriander stalks and leaves
salt to taste

About 3 cups fresh breadcrumbs
2 eggs, beaten
About 1 cup of cornflour to coat

Boil potatoes in skin. Leave to cool completely. Peel. Mash.
Add drained tuna, cumin, chopped coriander, mayonnaise, pepper, lemon juice and salt. Mix well until well combined into one large mound.

Shape into a three-sided cylinder using two tablespoons by turning and shifting from one tablespoon to the other. There's a name for this but I can't even recall what letter the word begins with.

Anyway the picture will help I hope. Lay them on a platter before the coating step.


Put the cornflour, eggs and breadcrumbs in three separate platters. Coat the croquettes in first flour, then egg and lastly breadcrumbs and put aside on a baking tray. This is a little messy and I had to wash my hands in between every three croquettes. I made 18 pieces in all.

Heat up 1 1/2 cups of cooking oil in a small wok or medium sized frying pan and fry the croquettes until a golden brown on each side. It doesn't take long at all as there is nothing raw inside. Drain on kitchen paper to rid it of excess oil.

Serve.

TIP : By dipping it first in cornflour, eggs, then breadcrumbs, a thin crispy skin will form giving the croquettes a little more crunch.

TIP : You can vary the ingredients by using 800 gm of white fish fillet instead of the tuna or minced meat or chicken. Personally I have never tried it with beef or chicken so I can't say how much you'll need. Give it a try and let me know. Vary the herbs as well.

Thai Green Chicken Curry


I actually thought that I would be posting a tuna sandwich recipe that an extremely kitchen challenged person could make but since I was making a Thai green chicken curry for dinner I might as well make it look pretty and take a picture.

I love Thai curries for their fragrance and plentiful use of herbs in the curry paste. It is very different from the Indian or Indian influenced Malay curry where dry spices dominate. Thai curries seem very delicate especially so the green curry, my favourite.

To my sis who asked for the recipe but is too lazy to look at my blog. Here it is. In my blog.

8 chicken thighs, skinned, deboned and cut into pieces the size of small postage stamps.
2 pieces kaffir lime leaves
1 1/2 Tablspn fish sauce
1/4 tsp sugar
salt to taste

1/4 cup frozen peas

1 cup thick coconut milk
1/2 cup thin coconut milk

Ingredients to be ground in a food processor with 1 or 2 tablespoons of oil:

5 slices galangal/lengkuas
1/2 inch piece ginger/halia
2 medium sized large red onions
12 cloves garlic
2 stalks lemon grass/serai
2 large green chillies
1/2 cup chopped coriander roots and stalks plus if you like the tops(leaves)
1 tsp ground coriander powder/serbuk ketumbar
1 tsp ground black pepper/serbuk lada hitam
1 tsp shrimp paste/belacan


Pour 1 cup of the thick coconut milk into a small wok or pot. Put in 4 tablespoons of the ground ingredients and the kaffir lime leaves and bring to a boil and then to a moderate simmer. Let the paste cook in the coconut milk until the milk evaporates to half or two thirds its original amount and some oil rises to the top or until the paste does not taste raw when you taste it. Probably about 10 minutes or so. I forgot to time myself.

But I don't find it is not necessary for the oil to rise to the top although there will be a slight sheen on the surface after the dish is done.

Add the chicken meat. Add salt, sugar and fish sauce. Adjust salt to taste. Allow to simmer until the chicken is cooked. (I like my curries a little on the salty side).

When the chicken is cooked add the thin coconut milk. You may add more of less depending on how much gravy you want. The consistency I like is like that of fresh milk. Some people like it thicker. So it is all a matter of taste really. Add peas and simmer gently for a 30 seconds more.

It's done. Serve hot with white rice. Revel.


OR


Saute 3 to 4 tablespoon of the ground paste in 2 tablespoons of oil until fragrant and the paste turns a darker green and oil rises to the top. Then add the thin coconut milk, kaffir lime leaves, fish sauce, sugar and salt to taste. Bring to a boil then simmer. Add the chicken pieces and then the thick coconut milk and simmer until the chicken is cooked. Add peas and adjust salt again.

Serve with hot white rice.

TIP : You will have extra green curry paste. Keep it in your fridge or feezer for two more dishes of the same amount as above.

TIP : Usually only the roots and stalks of the coriander leaves are used but I included the leaves because I wanted the curry to be more green which is my favourite colour. Always. Most of the flavour are in the roots and stalks though.

TIP : I did not include the fiery bird chillies because everyone at home except myself are heat intolerant. Add if you want a really spicy and 'pedas' Thai green curry.


Thursday, October 23, 2008

Ellice Handy's Light Chicken Stew


Towards the end of the nineteenth century on the 15th of August 1887 Sophia Blackmore, a volunteer missionary from England set up the first educational institution for girls in Singapore, then part of Malaya. It became known over time as the Methodist Girls School or MGS. The school was first located in Blackmore Drive in Singapore but later moved to a more spacious area in order to accommodate a larger group of students as the school became popular. It is interesting to note too that some boys , usually brothers of the school girls, were also accepted into the all girls school, albeit under strict parental guidance.

I always wondered who Sophia Blackmore was whenever I browsed Ellice Handy's 'My Favourite Recipes'. On page ten of the 1990 revised edition of the book is a recipe for Jam Drops and in bracket it says "Recipe from Sophia Blackmore". I have tried and tested this recipe many years ago when I was newly married and like all Ellice Handy's recipes I have found that I could swear by it. It was a lovely crumbly pastry filled with jam and quite, quite delicious.

On another page, is a recipe for Cheese Straws and again in bracket it says "From Mrs. P.L. Peach". I have yet to try this one but I can almost guarantee myself that it will be good.

I know now that these were English women and very likely fellow missionaries who had spent part of their lives in colonial Malaya.

Ellice Handy was the principal of the Methodist Girls School just after the surrender of the Japanese troops after World War II. It was she who brought the school back to its feet in the aftermath of the war in 1945.

I must admit, a little belatedly, and of course guiltily, that I had filched the original copy from my mother's cookbook collection when I left home. The original copy had a linen tape binding with a natural printed pressboard cover in beige. Oh if I could only get my hands on the original. It was first published in 1952, obviously after Ms. Handy had become quite familiar with those exotic Asian ingredients and dishes. She had proven herself to be quite adventurous for she even had a recipe for a durian cake. I am inclined to think that that was perhaps one of the first recipes for a western type durian cake in the world.

Her Curry Laksa is very authentic and so are her recipes for Siam Laksa, Indian Rojak, Mee Siam and loads more. I have always depended on her Curry Laksa recipe whenever I entertain and it has never ever failed me. My guests always went back for second helpings if not for thirds.

Her time and dedication to local foods and recipes have, I am sure, been very much appreciated by many a Malaysian during my mother's time. Her cookbook includes 'unusual' Malay recipes and uses both Malay and English terms for fruits and vegetables. I doubt that one can find many cookbooks in Malaysia with local recipes written in accurate detail and true to its origin in form and in taste at the time.

It is for this reason that I have always searched for her cookbook since I lost the original copy, the one that I filched from my mother's collection of cookbooks. I repent, both for filching and for losing that precious book although my mother still does not know it (snigger). I paid RM 39.50 for the reprint but it has never had the same feel as the original. The photograph below shows the 1992 revised edition.


With much nostalgia and searching I came across this website that stocks, buys and sells old cookbooks and it was there that I laid eyes on an image of the original book. Whatever vague visuals I had of it has been, thankfully, embedded deeper and now appears more defined in the recesses of my memory.

One of the first and best banana cakes that I have tasted was made from a recipe from this old cookbook. It was light, fluffy and delightfully delicious. That was the first time that I had used soured milk in a cake recipe.

The chicken stew recipe that I made for lunch today is based on Ellice Handy's recipe. It is utterly simple and although I have made it so many times throughout the years I still find that I need make almost negligible adjustments for improvement. The only thing that I have added that she did not mention in her recipe were two bay leaves. And as always the dish is deeply and satisfyingly delicious with the warm comforting feel that a stew should always have.

Ellice Handy has since passed on but the time that she devoted to 'My Favourite Recipes' will be treasured by many who have come across her book and have sworn their lives by it.

I share with you Ellice's Handy's Chicken Stew. Free range chicken or 'ayam kampung' would be good to use for a stew and this recipe is very good with beef as well.

1 chicken, cut into pieces (I used 4 whole legs)
2 desstspoons diced onion ( I used 1 Large onion) and I believe dessertspoon measures do not exist anymore.
3/4 cup sliced carrots (Iused the same amount of baby carrots)
3/4 cup button mushrooms ( I didn'y have any today)
A small piece of cinnamon stick
2 cloves
2 tblespoon flour
Salt and pepper
2 tblespoon butter (I used 3-4 Tablespoons of cooking oil)
2 bay leaves

Coat chicken chunks with flour. Season with salt and pepper.
Heat 3 to 4 tablespoons of oil in a frying pan and brown the chicken pieces all over but leave it half cooked. Remove and drain. Keep aside.

Saute diced onions in a tablespoon of oil until golden and soft. Put in chicken pieces and add enough water to cover chicken pieces. Stir a little.

Add salt and pepper and bring to a boil and then lower to a simmer. Add carrots and mushrooms and simmer till chicken is cooked through.

I added a tablespoon of cornflour and a little water at the end to thicken the gravy. Simmer a while more and serve.

Slurp and enjoy.


Wednesday, October 22, 2008

Cook Bake and Blogger On.....

When I started out with this blog I didn't quite know where I would be heading. Today a little over a month later I still don't. Would it be cakes, cake art, everyday food, or what. So far I've had a couple of cakes, some everyday food, two cake arts, and a couple of or whats.

I have decided that this would definitely not be, by any means, a personal blog as in embarrassingly personal. I have secret stories not meant for human consumption :). So apart from being a so-so cook and an okay-I'm-a-pretty-good-baker and a self taught cake-arter, after ...(excuse me...let me check for a minute...ok I'm back)...twenty one posts, I've run out of steam. I'm in the typical ' I don't know what to cook!' state. I'm having cooker's block (silliness intended) like writers have writers block.

Normally when I'm not cooking for a blog I would just cook what I had cooked yesterday. Easy. Problem solved. And tomorrow I would probably cook what I had cooked the day before yesterday. But I'm cooking for a blog. I can't do that. What would people think?

I knew that having a food blog would be quite a challenge for me because each member in our family has different likes and dislikes. They each have their own brand of allergies, their own brand of food tolerance or intolerance, their own spice heat metering and so on and so forth. And in all those years that we have survived each other we have never come close to a truce.

So the repertoire of dishes that I churn out everyday where everybody can eat the same thing is very limited indeed. Sometimes I would end up cooking this for the children and that for my husband and when nobody is around I would cook something really, really hot and spicy and revel in the silence of my deserted home. But when the resident invaders strike I am conquered yet again. So most of the time I curtail myself to cooking the limited number of dishes that everyone can eat in peace and without fear of impending threats.

Problem : If I were to cook all kinds of different foods, for a lark, who would eat them? And would I have to cook, in addition to cooking for my blog, the 'usual' as opposed to the unusual? Wouldn't that mean that I am doing exactly what I had planned not to do ten years ago? Wouldn't that mean that I am inflicting upon myself the pain that I had planned to rid myself of some years ago when or if the children stopped being children? Wouldn't that mean that I would be digging a hole for myself that gets deeper and deeper as I blogger on?

Yes.

So.

So all that talk about cook bake and be merry cook bake and be merry cook bake and be merry (up there on the title header) was just, in truth, a phony line, invented by me to fill up that space by meaningless repetition. Not in the least related to my true calling. For I am, to all intents and purposes, a reluctant cook.

The way I see it cooking in the true sense of the word cannot possibly be merry unless one considers washing up as an immensely desirable past time like the total satisfaction of the subconscious one gets from ticking off one's to-do lists or finding immeasurable pleasure in finding the just-right sized tupperware for all those left overs. Some people do. Check this post out, A Dip, Blended and Bright Green on Carolyn's blog of Field to Feast. Unbelievable. Totally. And I don't get it.

I envy her I do.

Absolutely.

So, you are asking me now, why on earth am I blogging? Food blogging you mean.

Answer : I have absolutely no idea. Perhaps it is just something that I have to do. Like finding the just-right sized tupperware for all those leftovers or ticking off my to-do list. Or having to do all that washing up. Perhaps I'm finding and have found a way out of reality and have lost myself in blogger land. I have fallen in and gotten quite lost. Just like Alice. Perhaps too, like Alice, I'm in on a journey of self discovery, seeking order in the my own confusion. Or I think perhaps, like housework, it's just a matter of cook bake and blogger on cook bake and blogger on.......

But what ever it is, with or without blogging, it still is......What shall I cook tomorrow????????

The answer I suppose is in here somewhere..


Some horrible looking limes that have seen better days.


Three lemons meant for some lemonade that never got made.


Five potatoes that I boiled this morning and abandoned.


And half a block of butter left over from the banana chocolate chip cake from my previous post.

HELP.

Tuesday, October 21, 2008

Black Pepper Seafood Udon


Ah...my favourite noodle dish. Thick, fat little things, dripping with sauce at each mouthful. I bought the fresh kind. A little pricey at 10.90 RM for a 600 gm packet at Jusco. But it was worth it as it contained no preservatives and no colouring and no trans fat. At least that was what it said on the packet.

Of course when I cooked it with seafood all cholesterol came running to join the party.

But the most wonderful part of it was that there were three individual packs inside of 200 gm each. Just perfect for a single serving!

Here goes...

200 gm Udon noodles (fresh)

2 cloves garlic ]
2 thin slices ginger] both garlic and ginger to be pounded in a pestle and mortar to a paste

1 Tablspn thick soy sauce
1/2 Tablspn light soy sauce
1/2 - 1 Tablspn honey
1 tablespn ground black pepper
1/4 cup water
salt to taste

1/2 red and 1/2 yellow or just 1 red sweet peppers

3 large prawns, shelled with tail intact and 'vein' removed
2 small squids, cleaned, skinned and scored and cut into squares

1 teaspoon cornflour with 1 tablespn water

Heat up a tablespoon of cooking oil in a pan. Saute ginger and garlic paste until fragrant over medium heat. Add the soy sauces and honey. Add ground black pepper. Stir a little. Add the water.Stir again and let it boil. Add the prawns and squid. Let cook. Add peppers and allow to cook just a little. add salt and adjust to taste.

Add cornflour mixtue and allow to thicken. Add udon noodles and mix well until the noodles are well coated. let it cook a little while until the noodles are seperate and well coated. Serve. YUM!

TIP : You could of course add any other veggies you like or prefer or use meat instead of seafood. Its really the black pepper sauce that makes the dish.

Chocolate Chip Pancakes


Not the healthiest of breakfasts so I served them for tea. Those chocolate chips in my fridge needed to be finished otherwise I would just nibble them away when no one was looking. This way my boys/young men would finish them off before I could finish the batter up.

You could add anything to the batter for variety. Blueberries, freshly grated coconut or sliced bananas for some more healthy versions.

Okay, okay, I feel a little guilty with the chocolate chips. So it will be a long while before I'll buy another packet again. Swear to God.

1 cup plain flour
2 teaspn baking powder
2 Tblspn sugar or according to taste
1/4 teasp salt
2 eggs
1/2 cup fresh milk
1/4 cup chocolate chips/frozen blueberries/ sliced bananas or grated coconut

Mix the first six ingredients until no lumps are visible. Add the chocolate chips. Stir. Let rest for at least fifteen minutes to allow the batter to thicken a little.

Heat a pan. Melt 1 or 2 teaspoons of butter in a pan and drop two tablespoonfuls of batter for each pancake. I cooked four pancakes at a time in my pan. Perhaps a bigger pan would be more convenient and will finish off the batter quicker.

TIPS : None. Oh well, don't omit the salt, even in sweet cakes, because it makes such a difference.

Serve warm with honey.

Banana Chocolate Chip Loaf Cake


Sometimes good things come in abundance like the left over sour cream from the choc chip muffins that I made two days ago. And the chocolate chips in the bag that's sitting in the fridge and the constant supply of bananas around the house. Leave it to waste we must not. Put that all together and I came up with a recipe that I'm quite proud of. Tender, moist, not too sweet and beautiful.

Truth be told, this is my second attempt. I made the same one yesterday but all the choc chips sank to the bottom followed very closely by the sliced banana pieces that I placed rather merrily on the top. It was absolutely delicious but unfortunately it did not do too well in the looks department.

So what did I do? I reduced the baking powder and baking soda and voila! A beauty to behold. My little baby.

I had a slice this morning, 22nd October 2008, Wednessday, and the cake was incredible! Even more moist and the flavours had settled in incredibly well. I suggest that you keep some overnight for the next day for some heaven. Self praise is no praise but can I help it?

Here's the recipe.

125 gm butter
170 gm (3/4 cup) granulated sugar
2 eggs
100 gm sour cream

180 gm plain flour
1 tsp baking powder
1/2 tsp baking soda
1/2 tsp salt

1 cup mashed bananas
100 gm chocolate chips (semi sweet)

Cream butter and sugar until pale and fluffy. Add eggs, one at a time, beating after each addition. Add sour cream and beat. Fold in flour and mashed bananas alternately with a spatula or wooden spoon, beginning and ending with the flour until the mixture is well mixed. Add in the chocolate chips and mix.

Level mixture in an 8 inch loaf tin. Add sliced bananas on the top if you fancy and bake at 180 C for about an hour. Check after 45 minutes by touching the surface. If it feels wobbly continue baking until it feels tender but firm to the touch. Test further with a tooth pick inserted in the middle. It should come out clean.

If the cake gets too brown on the top but is not yet fully baked just cover the top with a piece of foil to prevent it getting too brown. That was what I did for this lil' baby

The heat in my oven wasn't very even so it is difficult for me to give you a proper baking duration. But 1 hour should do it more or less. Enjoy.


TIP : Line or butter and flour your baking tin well. I used non stick baking paper and I avoided the need to grease and flour the tin. Less work and easier washing up.

TIP : Leave the cake in the tin to cool a little for about 10 minutes before removing from the tin. Any attempt to remove the cake while still hot might result in the cake breaking or falling apart. Especially when it is a very tender cake such as this.

TIP : You could add more choc chips if you're a chocolate addict or some chopped walnuts for an even richer cake.

Sunday, October 19, 2008

Sour Cream Choc Chip Muffins


Muffins. Extremely easy, quick and very yummy. I've had a fairly large packet of choc chips sitting in my fridge for the past month just waiting to be used. But I've been postponing using it up. I wasn't in the mood for cakes, muffins or the like. But my blog was beckoning. So here is a recipe that I've had for a pretty long time

A favourite with everyone. Sour cream gave it moistness and the generous amount of choc chips added to the moistness too. You could add more but that was the limit for me. Coarsely chopped walnuts would have been a good addition but I didn't have any. Keeps well and it was just as moist the morning after. I made this last night at about ten.

I took the top picture in the dark again. I just can't quite get the shots that I want. But it will have to satisfy for the time being. I must get that macro lens.

230 gm plain flour
2 tsp baking powder
1/2 tsp salt
120 gm granulated sugar

2 eggs
210 gm sour cream
110 gm butter, melted

300 gm semi sweet choc chips

Sift flour, baking powder. Add salt and sugar. Mix.
Melt butter. Cool. Add eggs and sour cream to melted butter. Mix.
Add wet ingredients to dry. Mix with a fork until just mixed. Do not over mix.
Fill paper cases in a muffin pan to the top.
Bake in preheated oven at 200 C for 6 to 8 minutes then reduce heat to 180 and bake for about another 15 minutes till done and golden on top.
Remove from muffin pan and let cool a little . Enjoy.

TIPS : Here's a link to the secrets of high domed muffins. http://www.preparedpantry.com/DomeSecrets.htm

Thursday, October 16, 2008

New Improved Mamak Prawn Fritters


I spent a sleepless (almost) night thinking about the pathetic photograph that I took of the prawn fritters yesterday. I woke up with prawn fritters on my mind (what else?)

So today I spent the afternoon making more prawn fritters and taking yet more photographs of prawn fritters. It was a long drawn prawn frittering Thursday!

Result : I ended up with an improved version of the previous recipe. And if I have to say so myself, I'll have to say that those were the best prawn fritters that I have tasted in a long long time. Such a minor adjustment that made so much difference.

And ah.....I now know now how to make use of the macro setting on my DSLR camera, indoors, at night, without getting strange alien hues in my photographs. I just turned the kitchen lights off and took the pictures in the dark. It seemed to work a little better, strangely enough.

Okay here's the much improved recipe and one that I wholeheartedly recommend. And I think these are actually better than the original mamak ones I've tasted. Look at that crust!


1 1/2 cups plain flour
1 tablspn cornflour
1/8 teaspn baking soda
A pinch of tumeric powder
1 1/2 teaspn salt
pepper

2 eggs
100 ml water, a tablspn or two more if the mixture is too thick that you can't mix

6 - 7 stalks of Chinese chives/kuchai, cut into half inch lengths
3 shallots, sliced finely
1 large red chilly, halved and sliced diagonally

12 medium prawns shelled, chopped coarsely

Mix all dry ingredients first. Add water and mix well until no lumps are visible. Add the rest of the ingredients and mix well. Deep fry in about 2 cups of hot cooking oil, a tablespoon at a time, until golden brown and crisp on the outside. Enjoy with a dipping of chilly sauce or mayo.

TIP : The addition of baking soda lightened the mixture a little more. I added a little more chives too and a little more prawns too.

TIP : Fry fritters until firm but pale and not brown at all. Lift out and drain. Re-fry them to a golden brown and you will have a beautiful golden crisp crust.

TIP : Baking soda never fails to add a deeper colour to your cakes and crispness to your fritters.

Compare it with the prawn fritters from the previous post and I'm ashamed of my yesterself.

Wednesday, October 15, 2008

Mamak Prawn Fritters - Cucur Udang


Today was a good day. This recipe has been evading me since I can remember and after ploughing through some disappointing experiments I never could get the chewy yet not tough, compact yet pillow light texture of the 'mamak' prawn fritters that they use for their Malaysian Indian Vegetable Salad or 'pasembur'.

But TODAY I found it!

And don't you just love the egg yolk yellow of the fritters inside? It's sooo authentic! (Ponder......ponder......ponder......I just changed my mind. I think its a little too gaudy. But that's what it really looks like in the shops).

This was an experiment carried out because we were having a guest over at mid-morning. So what better savoury to serve for a Malaysian mid morning snack than a vegetable prawn fritter? I'll tell you all the whys of this recipe later.

This recipe serves four.

1 1/2 cups plain flour, sifted
1 tbspn cornflour
1/4 teasp tumeric powder
1 1/2 teaspn salt
pepper to taste
2 eggs
1/4 cup water or stock

4 - 5 stalks of Chinese chives/kuchai, chopped into 1/2 inch lengths
2-3 shallots, sliced
1 large red chilly, halved and sliced finely, diagonally

10 fairly large prawns, 3 of them minced with 1/2 teaspn of cooking oil and the remaining 7 to be chopped coarsely

About 1 1/2 cups cooking oil for frying

Stir all the dry ingredients until well mixed. Add the eggs and liquid and mix till smooth.Add in the prawns (both the minced and chopped ones) and the vegetables. Mix thoroughly.

Heat up about a cup and a half of cooking oil in a small wok. Drop tablespoonfuls of the mixture into the hot oil and fry until a golden brown.Make sure they're cooked in the middle since the puffs are quite big. Drain on kitchen paper.

Cut into chunks and dip in Lingham chilly sauce or mayonnaise to savour. (I love Lingham's - the chilly sauce not the man)

TIP : Starchy cornflour contributed to the chewiness of the fritter. I made the batter thick and gooey instead of slightly runny. This also gave it the solidity and compactness that I was looking for.

TIP : The two eggs used contributed to the lightness and sponginess but at the same time giving a firm structure as well as a richness to the fritter so that it did not taste tough, dry and floury.

TIP : The addition of coarsely chopped and irregular shaped vegetables and prawns caused air pockets to form in the batter as it cooked. In contrast to the denseness of the rest of the fritter this gave the fritter a lightness as you bite through little air pockets that were achieved without having to resort to any leavening agents.

I don't like that photograph at all. :( I'm still working on my photography skills. Please bear with me. TIPS anyone? oops my sons say it's the food that's ugly.....as in the colours and the whole look in general...in that case maybe we should play down on the tumeric thing.......but it's tummy yummy though. So never judge a food by its colour.

Tuesday, October 14, 2008

Young Jackfruit in Coconut Milk - Gulai Lemak Nangka


This is a smooth creamy dish of young jackfruit boiled in coconut milk. The yellow of the gravy is derived from a few slices of fresh tumeric. It's very easy to do and there is no sauteeing of ingredients at all. The addition of fiery bird chillies is optional but it does give the dish a bit of a kick. Something that we all seriously need once in a while.

400 gm of young jackfruit, cut into chunks
2 shallots, sliced
1 clove garlic sliced
1/2 inch fresh ginger, sliced
1/2 inch fresh tumeric, sliced
1 tumeric leaf

2 cups thin coconut milk, the consistency of very thin watery milk
1 1/2 cups of thick coconut milk
1 teaspoon tamarind pulp mixed with 1 tablespoon of water and squeezed to extract the juice
salt to taste

4 - 5 large prawns, skinned, with tail left intact
1 large red chilly, halved, seeds removed, if desired
1 bird chilly, optional

Place the sliced shallots, garlic, ginger, fresh tumeric, tumeric leaf and young jackfruit into a medium sized pot. Pour in the thin coconut milk. Add salt and bring to a boil and then bring it down to a simmer and cook for about forty-five minutes or until the jackfruit is tender.

This is what young jackfruit looks like. Still green around the edges and white inside as opposed to the deep yellow of a ripened one.


When the jackfruit is tender pour in the thick coconut milk, tamarind juice, prawns and chillies.

After adding the thick coconut milk do not allow it to boil as this will cause the milk to seperate and the oil in the coconut milk will rise to the top.

This gravy is supposed to be smooth and creamy without a layer of oil on the top as in a curry or in other Asian dishes.

Let it simmer gently, while stirring until the prawns are cooked. Adjust salt to taste.

Serve hot with plain white rice.

TIP : Constant stirring is the method by which one avoids the coconut milk 'breaking' or 'seperating' while cooking. That is the reason the jackfruit was cooked in thin coconut milk first and therefore left to boil and then simmer moderately as there isn't much oil in a thin and very diluted coconut milk to result in a 'seperation' (therefore avoiding the need for constant stirring).

The addition of thick coconut milk at the end of the cooking gives the smooth, velvety creaminess of the gravy that we are looking for and the pot is taken off the stove after just a couple of minutes.

Monday, October 13, 2008

Three Sauced Meat Balls


I usually make this with beef but today I used minced mutton and It was GOOD! VERY GOOD. I'm a little embarrassed by this recipe because it simply uses bottled sauces but WHO CARES. It was good. So although I'm not being paid for the advert those are the sauces that I used plus one more - Maggi Tomato Sauce.

Mutton and lamb gives a much smoother and finer texture in the meatballs than beef. And for extra moistness I used milk in the meat ball mixture plus a few spices which married very well with the sauces.

This recipe should serve six hungry people or four hungry ghosts.

600 gm minced mutton/beef/lamb
2 cups fresh breadcrumbs (5 slices of bread)
1 Tbspn coriander powder/serbuk ketumbar
1 Tbspn fennel powder/serbuk jintan manis
1 Tbspn cumin powder/serbuk jintan putih
1 1/2 tsp salt
5 - 6 Tbspn fresh milk
Dash of cayenne pepper or a dash of black pepper
Dried parsley flakes

1 large onion, diced
3 cloves garlic squashed

2 Tbsp Lingham chilly sauce
4 Tbspn Maggi Tomato sauce
4 Tbspn Heinz BBQ sauce ('regular' or 'chicken and ribs')
1 1/2 cups of water

1 teaspn cornflour
1 Tbspn water

10 pieces of curry leaves (optional) but how can you resist the aroma of it.

Vegetable cooking oil

Make meatballs :

Mix minced mutton, breadcrumbs, powdered spices, black pepper or cayenne pepper, milk, salt and dried parsley flakes. Mix well with hands. Shape into balls the size of a small lime or, I suppose, that of a walnut (although I've never actually seen one whole).

Shallow fry the meatballs in a some oil until they turn a nice crusty brown on the outside but it doesn't matter if it is half cooked inside. Drain and keep aside.

Remove some of the oil and leave 2 tablespoons in the pan. Saute the diced onions and garlic until soft and slightly brown at the edges. Pour in the three sauces. Add the water. Stir.

Put in the meatballs.Stir to coat. Season to taste although you don't really need to at all. Add the cornflour/water mixture and stir to mix. Let it bubble and simmer until the meatballs are completely cooked and the sauce has thickened.

Serve hot and yummy with plain rice like I just did.

Sunday, October 12, 2008

Baked Kuih Seri Muka


I Know, I know, I have yet to make the Kuih Makmur to post it on the blog. I will. Too much kuih Raya is preventing me from making it too soon after Eid.

In the meantime, try this baked Kuih Seri Muka or literally translated 'Radiant Faced Cake'. LOL. This version is baked not steamed as it traditionally is. It is much more convenient and hassle free and turns out beautifully. It's very much like a sticky rice pudding with a rich, velvety custard topping. Very delish.

When you do make this do not omit the salt. It makes all the difference as the salt brings out the richness of the coconut milk flavour and makes the kuih one of the best.

Try to use fresh pandan leaves too and not green food colouring or the pandan flavouring from a bottle.

The bottled flavouring has no flavour. At all. And the green colouring cannot beat the natural muted green from a pandan leaf. I'm not a big fan of gaudy greens.

Of course if you live in an area not overwhelmed by pandan leaves carry on with the bottled stuff.

However, for the coconut milk, use the canned or packet kind.

Its important that you use an 8 inch square baking pan (lined with silicone or non-stick baking paper in one whole piece with ends that over hang the sides of the pan). Do not use a different sized pan.

This recipe makes about 25 pieces of kuih after cutting.


1 1/2 cups glutinous rice
1 3/4 cups coconut milk (the consistency of evaporated milk)
1/2 teaspoon salt

9 small or 4 large pandan/screwpine leaves, chopped roughly
1/2 cup water

4 eggs
1 cup castor sugar
1/3 teaspoon salt
2 Tbspoons plain flour
1 3/4 cups coconut milk (the consistency of evaporated milk)

Rinse the glutinous rice until the water is clean and clear. Drain. Put the drained glutinous rice into a rice cooker. Add salt and 1 3/4 cups of coconut milk. Stir. Switch on the rice cooker. When the button springs up to signal that the cooking is done leave the rice in the pot for another 20 to 30 minutes until the rice completely absorbs the coconut milk.

If, out of curiosity, you decide to take a peek into the rice cooker, do not be alarmed if you see a wet milky and gooey mess inside. If you let sit for another 20 minutes or so the rice would have absorbed all the coconut milk and it will be perfect for pressing into a baking pan.

In the meantime prepare the green custard:

Blend the chopped pandan/ screwpine leaves with 1/2 cup of water in a blender and then strain the juice. Keep aside.

Break 4 eggs into a medium bowl. Add in sugar and stir (do not whisk) until the sugar dissolves. Add strained pandan/screwpine juice. Add flour. Mix until there are no lumps of flour visible. Add in the coconut milk and SALT. Stir and strain into a medium sized jug.

Assembly:

Line an 8 inch/20 cm square baking pan with baking paper or silicone paper (NOT greaseproof paper). This is very important if you want for easy and clean cutting of the kuih/cake later. Make sure that you have excess baking paper all around (meaning that the paper comes about 1 inch over the height of the pan. You'll see why later.

Scoop the cooked glutinous rice into the lined pan. Spread it out and press down. Level it evenly with the back of a tablespoon or with the palm of your hand lined with a clean unused heat proof plastic food bag or cling film. The second way makes for easier leveling but do let the glutinous rice cool a little before doing that. If you don't then you'll know why I said that.

Press down firmly to make sure that there are no gaps and that the layer is tight and compact and reaches well to the sides of the pan. Pour over the strained green custard.

Bake at 170 C for 1 hour or until it feels firm when the baking pan is slightly shaken.

Let it cool completely. When it has cooled lift it out of the pan by holding onto the excess baking paper on the sides and place it on a flat surface. Cut as you wish into diamond shapes or into small squares. Delish!!


TIP : There is no need to soak the glutinous rice first as some people do before they steam it. If you do that your rice cooker will not work and the button will jump up while the rice grains are still raw. Its ok when steaming on a stove top but not when cooking in a rice cooker. Why? I'm not a scientist. I'm a cook. It just happened when I did that. :(

I figured that the glutinous rice had absorbed plenty of liquid upon soaking and it had reached a saturation point of sorts. Because it had fluffed up and is very starchy by nature it just wouldn't cook or boil in the relatively small amount of liquid that was used. The rice cooker couldn't do its work. (like I said I'm no scientist). So if you'll just do as I say I wouldn't have to ramble on. :)

TIP : Don't be appalled if you see that the edges of the cooked kuih/cake looking like a wrinkled prune, like in the picture below. That's the most delish part but the rest of the kuih/cake will be perfect.


TIP : The reason I insisted on not using greaseproof paper is because the paper will stick to the bottom of the kuih/cake and tear when you try to remove it. Unnecessary stress incurred. And while you're doing that the whole green custard will fall off because you have to turn the kuih/cake over to do the surgery. PLOP.

TIP : When cutting the kuih/cake, clean the knife after slicing along each length so that its easy to cut the next row without stickiness.

TIP : The low heat during baking makes for a smooth, velvety and silky custard.If the oven is too hot the custard will get too brown on top and air pockets will form in the cooked custard because the mixture was bubbling furiously in the hot oven.

TIP : For some reason the cooked glutinous rice layer never gets burnt or overcooked upon baking. I never could give a satisfactory explanation for that but if you could I'd love to hear it.

TIP : Do use the 8 inch square baking pan that I mentioned. The recipe is perfect for the size. Any larger or smaller and the height of the kuih/cake layers will be affected.


Friday, October 10, 2008

The Seven Sleeping Dwarfs Cake


This is a cake I made for one of my sons' seventh birthday. Years ago. I saw it in a book borrowed from a library. I think it was a book by Jane Asher. It was my first attempt at making and using fondant. The one thing I remember was that it was easy to construct and it was so much fun. The bottom headboard broke into two so I just stuck them back together with royal icing.

The heads : Just round pink balls and smaller round pink balls for the noses except for sneezy who has a larger red nose. Stick the noses on with royal icing.

Nightcaps : Triangle pieces of fondant in various colours and wrap them around each little head stuck on with a bit of water or royal icing.

Faces : Just draw them on with a fine paint brush dipped in brown food colouring : the eyes and mouths.

Feet : You can't see them in the photo but there are seven pairs of little feet sticking out from under the blanket. Just shape pink pieces of fondant to look like feet!

Hands
: Shape pink fondant into hands that curve over the blanket. Use a blade of a knife to mark the fingers. Seven pairs of them.

Slippers : Just shape pieces of fondant to look like slippers!

Bodies : They are just chocolate wafers under the blanket! Seven of them.

Head boards : Roll out the fondant in desired colour and cut out to size and allow to dry until hardened.

Blanket : The easiest part. Just roll out fondant into a rectangle large enough and drape over the 'bodies'.

Sneezy's white hanky : Easy as A B C. Just roll out fondant to size and stick to blanket.

Pillow : A long white rectangular piece just enough to fit the seven heads.


Construction :

Cover a cake board with fondant that is large enough for a cake and with at least 2 inches of extra space all around.
Use a cookie cutter to make attractive markings on the 'carpet' if you like.
Place a rectangular cake that's wide enough for seven chocolate wafers.
Cover with a 'bedsheet' of desired colour (preferably white)
Place the pillow on the top edge of cake.
Place all heads on the pillow.
Place chocolate wafers on cake to represent the bodies.
Cover with blanket so that it covers the wafers and the bottom edge of cake but leave a narrow space for feet.
Glue feet to bottom edge of blanket with royal icing.
Glue boards to both ends with royal icing.
Place slippers at bottom of bed.
Glue Sneezy's hanky to the blanket with royal icing.
Glue hands to the blanket arrangingy them suitably.
Pipe white beards for one or two of the dwarfs under their faces and over the blanket in curly wurly lines.

TIP : Only the heads, feet,little hands, slippers and headboards should be constructed ahead of time. The rest of the items are to be rolled out and constructed as you build up the bed.

There is no need to wait for the 'bedsheet' to dry or harden as it is just used to cover the cake and to not let the cake be visible from under the blanket. So it can just be thinly rolled fondant.