Saturday, October 30, 2010

A ROSELLE CORDIAL ~


There is something about a crimson coloured drink that makes it desirable and irresistible. 

I knew I had to make this when I saw it on The Hungry Caterpillar. The Roselle cordial is made from the sepals of the Roselle flower. A species of the hibiscus which is a plant native to the Old World tropics. It is of a deep plum colour, fleshy and crisp in texture, bizarre, kinky, alien-like, seemingly ready to scamper, creep, plunge, squeak, squeal and rule the world through my poor little chocolate addicted body.


H thought they looked weird, and winced when I offered him the cordial. I looked at him as adamantly as I was allowed to and, to my surprise, he relented and took a sip. Then he waved the half full glass of roselle out of my reach. I smacked his arm with my paw. As hard as I was allowed to. We grappled. We drank. We were in ecstasy and in joyful worship. Of Rosella. (Dionysus... move over)


Obviously it passed the test. So now it's bottled. Like a Genie.

It has a lovely flavour that hovers between a grape juice and a Ribena (a blackcurrant cordial). It has a slight tang to it too. It contains lots of vitamins and goodness-ess. Then I gave some to my mother.


Cordials are popular in this hemisphere. They are very sweet concentrated fruit flavoured syrups that need to be diluted with cold water, topped with ice cubes and then served.  In short, it contains copious amounts of sugar. It's the poor man's alternative to fruit juices. They are very refreshing.


The seeds found inside the sepals contain natural pectin and if these roselle sepals are to be cooked into a jam the seeds are boiled seperately in some water, drained, the seeds discarded and the gel like liquid that remains behind is added to the boiled sepals-sugar mixture to give it the final gel-like quality of jam. Fascinating.

PS ~ What a lovely and natural way to color cakes and icing.
The recipe ~ an approximation ~
300-350 gm roselle sepals
3 cups of granulated sugar
5-6 cups water

Rinse rosella sepals until clean. Drain. Pluck the sepals and remove all the seeds. 

Place water in a pot. Add sepals and bring to a boil and then a medium simmer for about 8- 10 minutes. The water will turn crimson immediately. Add sugar and simmer again until the sugar dissolves. Give it a stir. When sugar has dissolved and the syrup is a gorgeous crimson drain through a sieve and discard the sepals. 

Cool and store the syrup in a sterilized bottle.
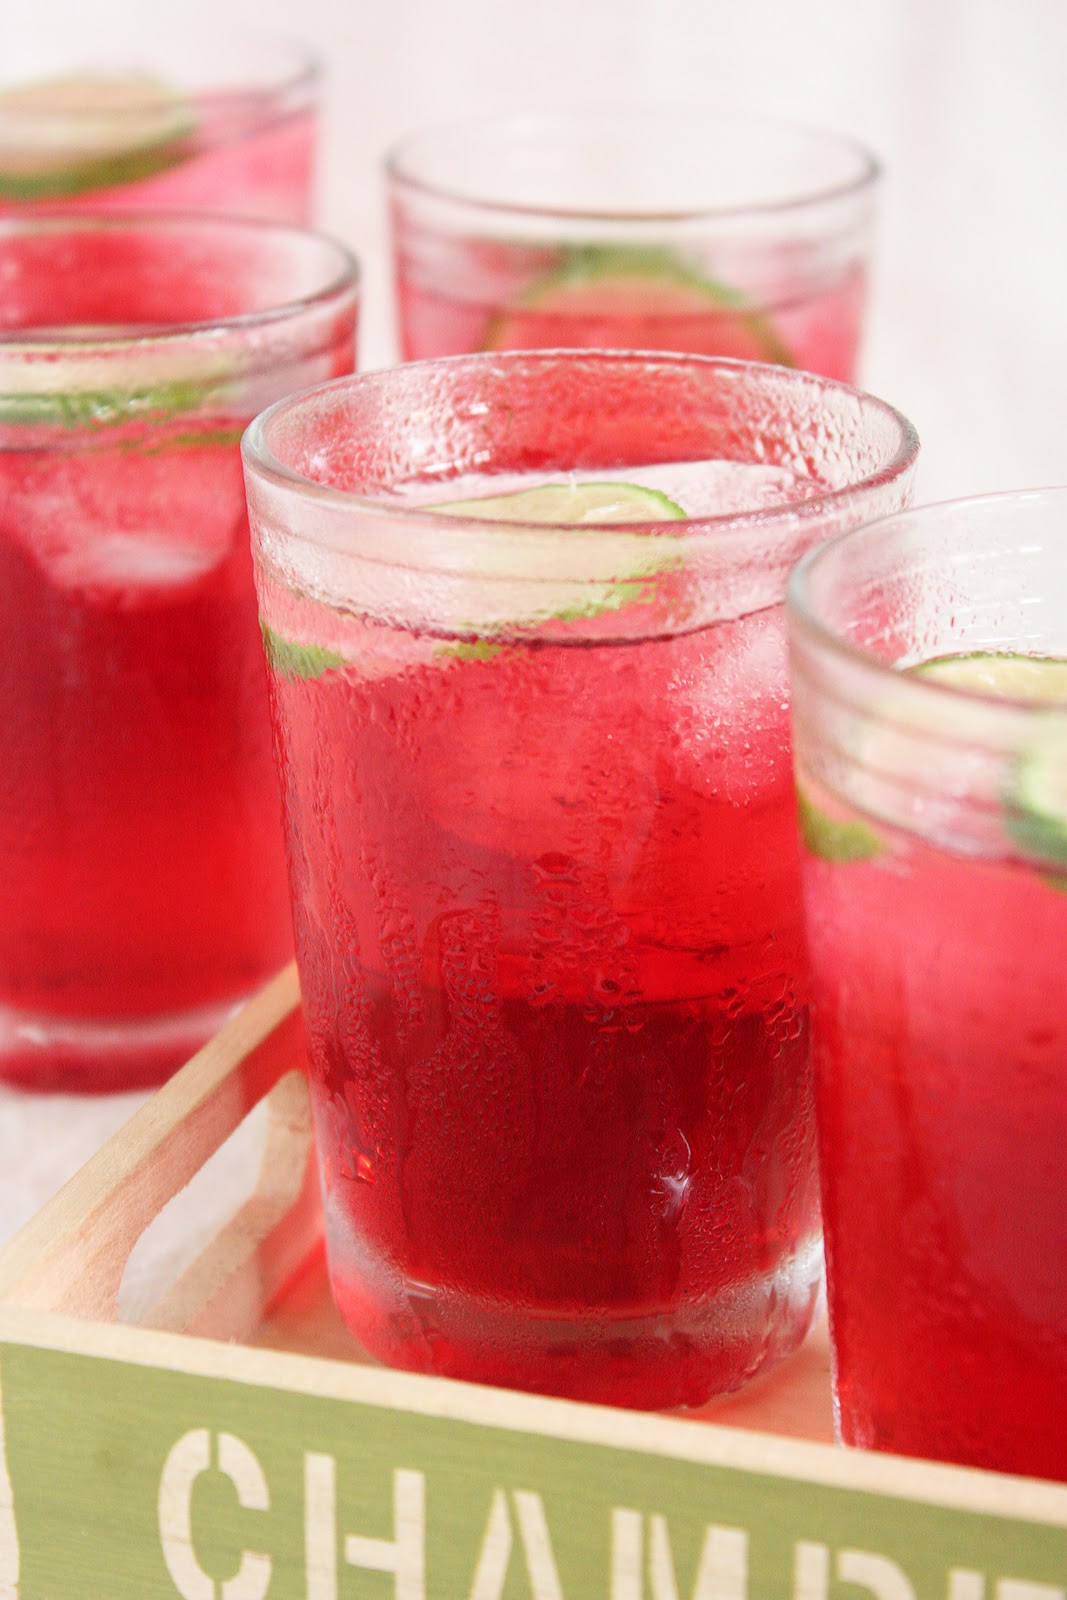
To serve ~  

Pour about an inch and a half of the Rosella syrup into a glass and then fill up to 3/4 way with chilled water. Add ice cubes if you like. Taste for sweetness. Add more of the syrup if not sweet enough or more water if too sweet. Add a squeeze of lime and some slices if desired. Drink and be refreshed. 


It's a beautiful and gorgeous drink. How could one resist ?

Tuesday, October 26, 2010

STARBUCKS BANANA WALNUT BREAD


I am not the only one who has been puzzling over the difference between a banana bread and a banana cake. Even David Lebovitz is as perplexed as I am. Yes I have, in total, spent between 1800-2100 seconds over the past ten years trying to sort out the difference between the two. 

An American friend of mine had offered me a slice of "banana 'bread' " one morning. I studied it and it seemed to me, in all its look and texture, a banana cake. At the time I didn't give it much thought. A shrug was all the puzzle had got out of me. But since I started this blog the question has become more immediate and urgent. I feel stupid. I feel shallow. I feel I should know. 


But then I thought, surely, it cannot be as perplexing as confronting the fifth dimension of wormholes and parallel universes or, at the least, cataloging the properties of subatomic particles such as quarks and gluons. Then.... Why?...People?....Have I not found the answer? Help. Michio Kaku? Einstien?

And I have also just learnt...yes ...learnt.... that Rose Beranbaum has a recipe for banana bread in her book The Bread Bible. She used a plain white bread recipe, added some milk and a couple of bananas to it and called it Banana Bread. Now that makes complete sense no? Yes. 

Yes it makes so much sense that I can almost write an algebraic formula for it. Like...........Bread + Banana = Banana Bread. Check. A++


But Ho No.....banana bread to the rest of the universe is simply banana cake. Eat your banana bread up Rosie. You're alone.  


So here I am I am.....with a Banana Bread recipe called Starbucks Banana Walnut Cake .....oops...Bread.  

Okay...I'll admit ...it's little bit denser than my banana cake, firmer perhaps, cuts more neatly, is more domed and uses oil instead of butter (but hey...a carrot CAKE uses oil too) and it's got stuff on top of it but is just as sweet, moist and delicious. 

This . just .  cannot . be . for breakfast. I forbid it! Banana 'Bread' indeed! Hmmmph!


The recipe ~ adapted from food.com.

I tweaked it a little by adding the zest and juice of an orange and instead of bananas I had used plantains. Because that was what I had darkening in the refrigerator. 

2 cups flour
1 tsp baking soda
1/4 tsp salt
1 egg
1 1/8 cup sugar  (you could reduce this to 1 cup)
1/2 cup vegetable oil 
2 T buttermilk
1/2 tsp vanilla extract (I omitted) and used instead the 
Zest of 1 orange and juice of half an orange
3 large ripe bananas or 1 cup mashed bananas
1/2 cup chopped walnuts
1/3 cup chopped walnuts
Some rolled oat to top the cake with

Grease and flour a loaf tin measuring 9x5x3 inches. Pre heat oven to 350 F.

Whisk together the flour, baking powder and salt in a bowl. Keep aside.

Beat egg, sugar and oil in another bowl until pale and well combined. Add flour mixture to egg/oil mixture and mix well, adding buttermilk as you go along and then the mashed bananas. Add in teh 1/2 cup of chopped walnuts. Combine.

Pour batter into the prepared loaf tin. level out and scatter 1/3 chopped walnuts and then some rolled oats over the top.

Bake for 50 - 60 mintes or until skewer inserted in teh centre comes out clean. If the top gets too brown before its done tent it with a piece of foil.

Sunday, October 24, 2010

PINEAPPLE POP TARTS


I wish this house was constructed of grilled meat, roast chicken, steamed red snappers, cemented with sambal belacan, furnished with rice and it's roof tiled with pop tarts. So that Starvers will be distracted while The Starvee photo shoots.

Pop tarts are what I made. And as a Malaysian, tarts only make sense when paired with pineapple jam. These........they were very good. The crust was crusty and buttery. And the jam.... it was obligingly sticky and subtly sweet. And the whole...it was out of this world. 


This just cannot be a breakfast food. I refuse to serve it for breakfast. I would probably refuse to share these next time too.


I checked out the recipe for the pop tart crust on Smitten Kitchen and then at Joy the Baker and realized that they were exactly the same. So the credits go to two of my favourite blogs.

Because I live in a green house it was very difficult to keep the dough cool and firm while rolling, filling and sealing it with jam. Constant refrigeration in between tasks was totally necessary. I made this in the evening when it was cooler. (Don't even think of working with this dough on a hot afternoon). I had also rolled out the dough between sheets of baking paper so that I could easily lift them on to a tray to chill in the refrigerator. It was worth it.

But I was not about to pause, evaporate, melt and take photos of the process. So do go here if you would like to see the step by steps. Photo-parantheses is for plants.


The recipe ~ Smitten Kitchen & Joy the Baker
  
Of course you could fill this with anything, ranging from Nutella, sugar and cinnamon, any jam, anything.

Crust
2 cups plain flour 
1 T sugar
1 tsp salt
1 cup butter, cut into cubes
1 large egg
2 T cold milk

1 extra egg for brushing

Whisk flour, sugar and salt in a medium bowl. Work in cold butter using a pastry knife or your fingers until pea sized lumps of butter are still visible and mixture just holds together when squeezed.

Whisk egg and milk and pour into flour mixture mixing until cohesive and the dough comes together in a ball. Divide into two and chill in the refrigerator until firm ..maybe 20 -30 minutes.

Lay a largish sheet of baking paper on the table and roll out one half of the dough until it becomes a rectangle of about 9 x 12 inches and the dough sheet is about 1/8 inch thick. Cut the rectangle into 9 equal sized smaller rectangles. 

Brush the sheet with beaten egg and plop some jam on each rectangle. Place the jammed dough rectangles  into the refrigerator while you roll out the other dough.

Roll out the other dough half (also on baking paper) to the same size as the first dough and cut them up in exactly the same way. Keep aside.

Take out the jammed dough rectangles and place them next to the blank rectangles. Lift each small blank rectangle and place it over a jammed rectangle and press down the edges with a fork to crimp. Finish off the rest in the same way.

Bake in a preheated  oven at 350 for 25 - 30 minutes or until golden brown.


Friday, October 22, 2010

RED & YELLOW WATERMELON GRANITA


I know....... summer in some parts of foodie world is over. But in my world ~  summer is forever. 

So there is nothing like an ice cold headache-inducing water melon granita to keep those heat waves at bay. This was just so refreshing that when my daughter and I mouthed the first few scoops of ice cold crystallized melon juice aka as granita while watching tv the heat outside just seemed to dissipate into a mirage-y blur and I felt transported to several degrees below 100. 


It was a continuous effort between cooling down and an ice cold headache. At times it was like my brain was being flashed frozen and the next minute relieved of it. It was a foodie's fight against nature. As hard as that may sound I would do granita again and again if the heat keeps up. Rain? Come again? Pretty please?

Of course granita turned to pleasant slush afterwards and I wished I had one of those big fat drain pipe straws then. Slurpy slurp.


I used red and yellow seedless water melon for these granitas. Since the watermelon was so sweet I cut it down with a few squirts of lemon juice. While I was at it I chopped some mint and threw it into the red watermelon slush/soon to be granita.  Gosh it was so good. These granitas.

So......

When you're feelin' kinda hotta 
Grab an ice cold and crunchy granita.


The recipe ~ serves many or when summers are forever

1 red watermelon
1 yellow watermelon
Juice of 1 or 2 lemons, if desired
pinch of sea salt
some chopped mint, if desired 

Scoop out the red watermelon meat. Place in a blender and blitz. Add a pinch of sea salt, lemon juice if desired. Swish and pour into a tub and when half frozen take out from the freezer and agitate it with a fork. Do it a couple of more times until you get granita according to the texture that pleases you. Scoop granita into individual glasses, layering the red and yellow granitas if you fancy, garnish with a sprig of mint and serve yourself and others. Best served when the sun is relentless and totally beating down on you. Mmm-hmmm. ~ Cooool ~

Ditto for the yellow watermelon granita.


Photographing these granitas was a nightmare. They slushed on me.

Wednesday, October 20, 2010

GRILLED CORIANDER & LIME CHICKEN


Rachel Allen made this. Yes the pretty Rachel Allen, with the charming unplace-able accent, whom I always associate with  cakes, pies, cookies, pastry and all things sweet, nice and dainty. And with daisies. Whom I would never place on the same page as fish sauce.

Then one day I caught her making a grilled chicken dish. What a surprise. It was an Asian inspired grilled/roasted chicken dish too. With fish sauce. It was very, very good. FM (Family Members) thought it was sedaaaaap and they kept requesting me to make it again and again. And again. Which is a treat because the aroma of the coriander, lime, lemon grass, ginger, garlic just floated, flirted and flounced with me all around the house. As fragrant as a field of breeze blowin' daisies.

So, my friends, bookmark this grilled/roasted chicken recipe. It'll make us all breeze blowin' happy.


What I found different about this grilled/roasted chicken was that the chicken pieces were slashed at intervals before marinating. Which meant that the marinade could get right into that meat. Which is a good thing of course. The only apprehension I had was that the finished grilled/roasted chicken would look quite mutilated and dry. No?

No. Everything looked mouth watering and and civilized especially when the melted chicken fat and juices started dribbling on and into the crusty parts  of the juicy, golden roasted chicken pieces. 


Post meal

In an an ideal world, scrubbing a roasting pan would not be something one needs to stare at and contemplate over after a meal. But since it isn't (an ideal world) I so do (contemplate).  And my little maid mind told me that if  I lined the pan with thick aluminium foil right up to the sides all I'll have to do, when the roasting's over, is to peel off the foil and I will be greeted by a gleaming and spotless roasting pan grinning back at me. Now that makes me breeze blowin' happy. It so do.

The recipe ~ adapted from Rachel Allen's tv cooking show

6 chicken whole legs, skin on
Juice of 5 limes
8 cloves garlic
2 knobs ginger, grated
2 lemon grass, white bulb sliced finely
1 tsp sugar
about 1-2 T fish sauce (I forgot to measure this)
1 bunch of coriander leaves, chopped


Place all ingredients except the chicken parts into a small food processor and blitz until all ingredients are fairly finely processed. Taste for salt, tang and sweetness. Adjust if necessary. It tasted so good even at this point I was swooning.


Slash chicken pieces at 1 inch intervals. The whole legs may be cut into parts consisting of thighs and drumsticks if you prefer. Rub the marinade all over the chicken pieces, place in a large Ziplock and marinate at least an hour or better still overnight.
Preheat oven at 350 F. 

Place the chicken pieces on the rack of a roasting pan. Save the excess juices for later. 

Roast marinated chicken in oven in a roasting pan with a rack for about 45 - 50 minutes. Check for doneness between the slits. If the juices run clear with no hint of pink, it's done. 

Remove chicken from pan onto a platter and keep aside, covered with a piece of foil to keep warm.

Pour the extra marinade into the roasting pan. Scrape the pan with a wooden spoon so that crusty bits at the bottom loosen up. Stir the extra marinade into them. Push the pan back into the oven and allow the marinade to bubble up and thicken some. Once it looks reduced and fairly thick and syrupy pour that over the cooked chicken pieces. Garnish with some chopped coriander.


Serve this mouth watering grilled/roasted chicken with white rice like I did.


Sunday, October 17, 2010

STRAWBWERRY BUTTERMILK CAKE ~ SMITTEN KITCHEN


I had a moment of alarm when I got up two mornings after I had made butter ~ and buttermilk. I had the need to make something out of it quickly. I knew the feeling of regret that would sink in if I finished the butter before it had a chance to be a part of something bigger.

So off I went in raid of Smitten Kitchen's kitchen in search of a buttermilk cake. And I found it ~ a  raspberry buttermilk or 'any fruit' cake. I decided to add a generous cup of ground almonds to Deb's recipe. I loved the way it turned out. 


Over the years I have come to learn to decipher recipes. I know a cake is moist by looking at the proportion of sugar in regards to the rest of the ingredients, particularly flour. The more sugar there is in the recipe the more moist the cake will be because as the cake bakes the sugar turns to syrup. Unfortunately that also leads to teeth rot.

Too much butter, on the other hand, makes the cake greasy (denser and heavier) rather than moist so that you swivel to reach for a napkin to wipe your oil slicked fingers and lips with (if your fork went missing).

So in my book ground nuts make the perfect medium for adding that extra moistness and richness to a cake without the threat of wincing sugary-ness or slick greasiness because the oils from the nuts remain in the nuts and does not seep completely into the cake making the cake softly moist, delightfully crumbly and airy, while the addition of an extra non-sweet ingredient cuts through the sugar to make the cake subtly sweet.

What I also liked about this recipe was that it required only one egg. It was just enough to hold the cake daintily together. 

In nine words ~This recipe goes into my Greedy Book of Cakes.


This simple recipe had also produced the kind of cake that I like the look of ~ a cake that requires no adornment because I can always pass it off as rustic, charmingly  rough-hewn and with amusing sink holes. The last, definitely a giggling point.


What a pity the strawberries turned pale as the cake baked. But the cake was deliciously moist. 

This is a cake I will make again and again. Next time with kalaedoscopic bits of tutti frutties on top. Along with a little prayer that they don't all sink in.

The recipe ~ adapted from Smitten Kitchen

This is supposed to be a very thin cake. The recipe called for a 9 inch pan. I used an 8 inch pan. 

1 cup (130 gm) all purpose flour
1/2 tsp baking powder
1/2 tsp baking soda
1 cup of ground almonds
1/4 tsp salt
1/2 stick (56 gm) butter, softened
2/3 cup (146 gm) plus 1 1/2 T sugar
1/2 tsp vanilla extract
1/2 tsp finely grated lemon zest (optional) (I opted out)
1 large egg
1/2 cup well shaken buttermilk
1 cup fresh raspberries or any fruit ( I used strawberries)

Preheat oven to 400 F.

Whisk together sifted flour, baking powder, soda and salt in a bowl. Add the ground almonds and mix well. Keep aside. 

Beat softened butter and 2/3 cup of sugar until pale and creamy and light with an electric mixer. Add vanilla and egg and mix well.

At low speed mix in flour/almond mixture in 3 batches alternating with the buttermilk and ending with the flour. Spoon into cake pan and spread evenly. Arrange fruits on top as you like and sprinkle the 1 1/2 tablespoon of sugar over the top evenly.


Bake in a preheated oven for 20-25 minutes until the top is golden brown or a toothpick inserted in the centre comes out clean.


Wednesday, October 13, 2010

BACK TO BASICS ~ HOME MADE BUTTER


This is a truly inspired post. Inspired by the talented Quinn of  Quinn's Baking Diary. Quinn has not blogged about this yet but she had facebooked it. 

I was smitten and so were many of her facebook friends. And I promised her I would make this since over beating is in my nature. Indeed if there is anything that I will over beat to a hilt and without a quiver of guilt in the future it will surely be cream.

Yes Ma'am. When I had created the butter I felt like a little Miss Dairy Queen who had just milked a cow and who lives on a farm with plenty of know-how.


Some of us, like me, after some googling, will know that cream is the butterfat-rich part that rises to the top of non homogenized cow's milk. It is not made. It is, in the words of www.ochef.com, "an ur-ingredient if you will." "It is not the product of another recipe, it is a naturally occurring food that you cannot make yourself." Like chicken livers, salt and apples" says he.

But butter is something else. Butter is made the way I just did. By over whipping or over beating cream. 

When I had made the butter, the butter made me ~ a little Dairy Quinn.


Whip whipping cream. Then, over whip it.

Like magic, the cream will first look as light and as fluffy as a cloud, and then it will go on to become curdly and quite, quite ugly and when, finally, it splits completely, a little like magic again, you will be very pleased to see a solid hump of yellow butter swimming in some swishy, skinny milk which, by the way, is what is called buttermilk. 

You'll be laughing and moo-hooing all the way to the refrigerator. Because you have not just made butter but buttermilk too. Moo-hoo.

Drain the buttermilk from the butter in a sieve and rinse the butter under the tap or by pouring filtered water over it. Pat dry gently with a paper towel. Pat into a suitably sized bowl and keep both butter and buttermilk in the refrigerator.

The after effects of making butter ~

I had a conversation with myself ~

Me : I wonder how long it will keep before it turns rancid? 

Me :  I don't think it'll sit around long enough for you to find out.

Me : And you know what? 

Me : What?

Me : It tastes just like butter! 

Me : Heck.... it is butter.


Me : I still can't believe I've made butter. 

Me : Aren't you're such a clever old cow. Moo-hoo.


Thank you Dairy Quinn. xoxo


Do you always buy a 1 litre box of whipping cream because it's cheaper than buying the smaller 250 ml packs? I do. Only now I know what I'll do with the cream that's always left over after I use part of it. Make butter. Would you?

Monday, October 11, 2010

CREAMED CORN ~ CHUCK'S DAY OFF


 What would we do without passion? I suppose we would exist simply because we do. What kind of persons would we become? Without passion, without desire, without wants that rise above needs and necessities? What kind of persons would we become if we denied ourselves some space and self interest? What kind of persons would we be if we exist wholly for the service and for the pleasure of others or of something? What kind of persons would we be if everything we feel, think and do becomes a duty? Becomes controlled?

We would be persons without passion. We would be mechanical. We would be essentially inhuman. We would live a life devoid of desire, a life lacking of love, an existence empty of empathy and most of all we would be creatures without quirks and impulses, without intuition, without sensibilities, without meaning and without life.

Therefore I quirk. Therefore I make no excuses for impulses that make me do or say or write nonsensical things at nonsensical moments with nonsensical excuses. Sometimes. For making nouns verbs or verbs nouns. For thinking aloud. For clowning around. For making creamed corn. For stringing nonsensical sentences that have no meaning singly or apart. For using words like singly. For following my mind into it's crevices and it's dark turns, for squishing it here and there to test its limits, for agreeing to boggle myself and others, for letting it flow, for letting it go, with the flow, for letting it work without me or me without it. Like when I made creamed corn. A mindless recipe by an impassioned chef ~ Chuck.


Gapped-toothed, springy as a lamb and earnest - Chuck Hughes, with a holey moley basking on his cheek. He made a mindless creamed corn, passionately, and made me desire it too. It was zealously creamy, savoury and delicious. It was passionately umami-ed.


Fresh raw corn is sweet and crunchy and I love nibbling at it raw. The sugar in the corn is sensitive to temperature. So in order to keep the sugar as sugar, buy corn still in their husks, refrigerate them (in their husks) as soon as you arrive home otherwise it will turn to tasteless starch if you leave it lying around too long in a warm room.


Another way I prepare corn is to steam them (shucking just before putting them into the steamer when the water comes to a rolling boil), when cooked, I swipe butter over the cob while still pretty warm, sprinkle some salt all over and sink my teeth in. Juicy. The best. But whichever way you eat corn it's best if it's sweet. So buy fresh with the husks on and keep cool (pun not intended).

Here's the recipe by Chuck Hughes ~


3 ears corn 
1 cup whipping cream
1-2 T butter
Coarse salt
freshly ground black pepper


Husk and slice of the corn off the cob. Place in a medium pot. Add 1 cup of whipping cream. Bring to a boil and then simmer for about 10 minutes or until the sauce thickens, is reduced by half and the corn kernels have plumped up.


Add the butter, salt and pepper. Serve. Juicy!

The result was utterly still sweet corn in a delicious creamy sauce. The best creamed corn I have ever tasted. The family just loved it. Thanks to Chuck and his grandma.


PS ~ The photographs were taken at different times of the morning. I had a hard time. 


Dear Sun, Clouds....dear God,  Peek-a-boo is not fun.


Sunday, October 3, 2010

COMING BACK SOON ~


My apologies for the gaping silence since my last post. I offer no excuses because there are simply too many. And too much excitement too. I have been doing things. Some of which I have not been doing since some thirty odd years ago. Because.... I have been doing things with my grandchildren. The list is long ~

~ Shopping
~ Cuddling
~ Cuddling
~ Cuddling
~ a whole day's ride and fright at the amusement park 
~ cuddling
~ bowling
~ cuddling
~ ice skating
~ cuddling

And......... before they leave next week we plan another hair raising afternoon at an indoor amusement park.

Yes... days have been filled with much amusement and it has been a hands on affair. And in the words of my 11 year old granddaughter N, "It was horribly fun". But thank god they have uncles too. 

I will be back soon. Promise. I have some great recipes that I can't wait to share and perhaps a giveaway too. 

Thank you to those of you who have commented and emailed to ask after me. You know who you are. And to those of you who have been visiting in my absence. Blogging ......it's sweet :):):)

Happy Days and Much Love,

Zurin

LinkWithin

Related Posts with Thumbnails