Friday, August 27, 2010

CHOCOLATE CASHEW COOKIES AND A WINNER FOR THE PRINT GIVEAWAY


Thanks to the Foodbuzz community these cookies made the Top 9 on 30th August 2010. Happy Buzz Day.

Dreams are strange creatures. You close your eyes again in the hope of dreaming on. Because you want to know how it ends. Like a good movie. But it never does does it? The quest for the complete dream with a beginning, a middle and an end always eludes us. I guess chasing the dream is very much like chasing the 'best ever' cookie recipe. It's endless.

So in my quest, this is another new cookie recipe for the festive season. I will still bake the same old good old but there is always room for the new cookie recipe.  This time it is a chocolate cashew sugar cookie. I got the idea from here at Fake Food Free but made them from an adapted sugar cookie recipe.

It was chocolaty but I think it needed more cashews.  


The recipe ~

6 oz plain flour
2 oz cocoa powder
1 tsp baking powder
4 0z  butter
6 oz castor sugar
About 2-3 oz cashews or however much you like, chopped quite finely (I did not measure this)
1 egg 
1 tsp vanilla essence


Sift flour, cooca and baking powder into a bowl. Rub in butter until like fine breadcrumbs. Mix in sugar and as much cashews as you like (leaving some to roll the dough logs in afterwards), add beaten egg and mix until it forms a dough. B ring the dough together with your hands pressing gently until it comes together to form a firm ball of dough.


Roll dough into cylinders or logs in the size you prefer. Roll to coat the logs in crushed or chopped cashews. Chill in the refrigerator and when firm slice into thin rounds.


Bake at 190 C on greased baking trays for 10-12 minutes.


Aaaaaaanndd.................the winner of my Print Giveaway by Brochures Printing Online (by random.org) is........number 18 (I still can't figure out a way to copy and paste the winning number).


Chisum's Crew you're the winner :-)!!!


Sunday, August 22, 2010

QUICK BREAKFAST NOODLES


Hi everyone! Here's a quick post of some breakfast noodles. It is simple and uses dried prawns as the main flavour base with added bean sprouts and chives for added flavour and texture.


And crushed bird's eye chillie fo a nice kick. Yum!

I made this on the same day that I made the hot sauce.


I used skinny noodles from a packet (horrors) but it did have a few NO'S on the packet.....like NO preservatives, NO MSG, No Colouring. I suppose that's as close to homemade as I can get. 


I'm out of steam, out of energy and out of time these past few days. I need to get working on those cookies. And I think I'm in  need of a plan just so I can carry out my plans.


 The recipe ~


This noodle dish is so simple yet so full of flavour and makes a nice filling breakfast, lunch, snack or even dinner.


2 squares of skinny noodles

6-7 pieces dried prawns, soaked in water for about 10 minutes
2 pips garlic
2 bird's eye chillies or a large chillie pepper
a handful of bean sprouts
a handful of chives
dark soy sauce
salt 
cooking oil


Blanch noodles in boiling water until it softens and is cooked through.It won't take long depending on the noodles that you are using.

Pound dried prawns, garlic and chillies in a pestle and mortar until fairly fine.

Heat a wok and pour in about 2 tablespoons of oil and then saute the pounded ingredients until fragrant and the paste looks a little golden at the edges. 

Throw in the noodles, bean sprouts and the chives and some soy sauce and the salt. Give it a stir to mix them all up well and evenly. You may add some water if it too dry. Serve with garlic ginger chillie hot sauce and a wedge of lime. Enjoy!


I am submitting this to Muhibbah Malaysian Monday hosted by Shaz of Test with Skewer and 3 hungry tummies.


Wednesday, August 18, 2010

GARLIC GINGER CHILLIE HOT SAUCE


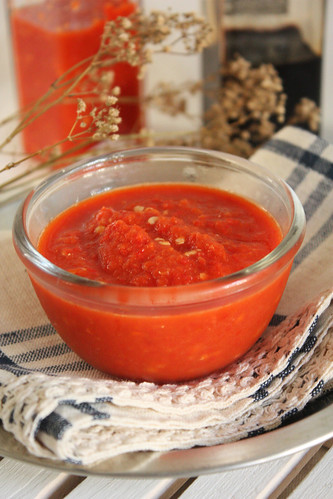
Nothing fancy here. It's just a garlic ginger chillie hot sauce. A chicken rice hot sauce. All you need is a blender and a swoosh and it's done.

Ju made this exact sauce a couple of days ago as well. I'm not surprised if we had made and photographed it on the very same day. We share the same vibes. I believe that this is the third time we've made similar food and posted it within a whisker's post of each other's. It's one of those strange but true occurrences. 


This hot sauce is great with steam boats, chicken rice, stir fried noodles, rice, soups, as a dipping for fritters. Anything and everything I suppose. Whatever makes you happy and whenever your palate needs a bit of a kick.

Its kind of sour and spicy with a very subtle tinge of sweetness to it. Very very very appetizing.


The recipe ~


10 chillies plus some/many bird's eye chillies if you like
6-7 pips garlic, peeled
1 inch ginger, peeled
1/2 cup apple cider vinegar
1 T sugar
salt to taste


Wash and ch0p chillies into chunks. De-seed them if you wish. Put chillies and everything else in a  blender and blitz until it becomes a thick sauce. Add salt to taste. Store in a jar and better still in the refrigerator.

I am submitting this to Muhibbah Malaysian Monday hosted by Shaz of Test with skewer and 3hungry tummies


IMG_3063contrastsmtshpn

Sunday, August 15, 2010

HApPy dAyS CHCOLATE CAKE AND A PRINT GIVEAWAY


This giveaway is closed today 27th August 2010.Thank you so much to those who participated.

The winner of my Print Giveaway by Brochures Printing Online (by random.org) is........number 18 (I still can't figure out a way to copy and paste the winning number).

Chisum's Crew you're the winner :-)!!!

If you're running a business I'm sure you would have thought of  brochure printing to promote your products or services.

Brochures Printing Online is a company that prints brochures designed to your exact specifications. They help you to create custom brochures and their team of design experts will help check and ensure the quality of your prints before sending them off to their printers. 

"We print your brochures using digital or offset process to make sure that you have the best quality at the best price available." 

Click on the image below to learn more.


And this is the giveaway Brochures Printing Online is offering to one of my lucky readers ~

100 8.5x11 Trifold Brochures   
100lb Paper Gloss   
Trifold/Letterfold, Z-fold   
4 Color Both Sides Printing  

It's limited to US residents 18 years and above.      

Just leave a comment and the winner will be picked using random.org. 

 If you would like to try for an extra entry please visit Brochure Printing Online and leave a comment telling me which item would be most suitable to your needs. 

If you would like to top it with 2 more entries post about this on your blog and/or facebook it and leave me the link/links. 

This giveaway will be opened until the 25th of August 2010. I will announce the winner on the 26th of August 2010.

Good luck and Happy Days!


But far, far away from the land of digital and offset processes I did my own printing ~In cake. It was for N and R's birthdays. They were born on the same day 4 years apart.

I used silicone word moulds sold online at SiliconeMoulds.com. Moulds that were designed by a dear blogger friend Sarah Jane. You must visit her lovely blog, siliconemoulds.blogspot.

Silicone moulds is an online store that sells silicone bakeware moulds for cakes, jellies, chocolate, soap and many other uses and is the only store, online or otherwise, that sells silicone word moulds.


The only decoration I did was a dusting of icing sugar over a piece of plastic grid to get the grid effect.


When you're happy and you know it clap your hands. Happy birthdays to our dearest N and R.

  
                             HApPy dAyS CaKe


The cake I made is one from my favourite cake 'chemist', Rose Levy Beranbaum. Her recipes have never failed me and this chocolate cake is as good as it gets. Fudgy, chocolaty and never too sweet.   

The recipe ~Rose Levy Beraabaum's

85 gm cocoa powder
1 1/2 cups boiling water3 large eggs (150 gm without shells)
vanilla extract
300 gm plain flour
434 gm light brown sugar
2 1/4 tsp baking powder
3/4 tsp baking soda
3/4 tsp salt227 gm unsalted butter

Preheat oven to 170 C.

Grease and flour 2 9" round cake pans.


Whisk cocoa and boiling water until smooth. Cool to room temperature. 

In another bowl combine egg and 1/4 of the cocoa mixture.


In another bowl combine dry ingredients and mix on low for 30 seconds. Add butter and remaining cocoa mixture. Increase speed to medium and beat for 1 1/2 minutes. Add egg/cocoa mixture in 3 batches and beat for 30 seconds each time. 


Pour into pans and bake for 20-30 minutes or until a skewer inserted in the centre comes out clean.

For these moulds I had only to make one recipe of this cake and pour the batter slightly more than half way up the sides of the moulds. When baked leave to cool completely in the moulds before turning out. 


Tips ~ Before turning the cakes out pull the sides of the mould away from the sides of the cakes, gently, to loosen them up. The cakes will then literally fall out of the moulds when you turn it out. 


Turn the cakes the right side up and slice off the mounds to level the cake and then turn them over again so that the bottoms are facing upwards and are displayed as the top of the cakes. Decorate as you desire.

If you're using silicone moulds do go to my CAKE post for further tips on using silicone moulds.


Friday, August 13, 2010

CASHEW NUT CURRY


If only maids were made in heaven I would have been a rested and happy woman in a newly cleaned and sparkling home. But no. I had to have two of the most incompetent and obnoxious maids delivered to my door yesterday. I was bluffed into believing that they were well trained and experienced. Silly me.

At the end of each explicitly explained task they stood and wavered looking extremely disgusted. I don't blame them. That is why I hire maids. Duh.

They grumbled and probably swore their way through the housework for almost three hours while I attempted to curb and guide them into some form of what I thought were logical and common sensed tasks. I think my eyes glowed.


After three hours when the job was 'done' and the house somewhat less than sparkling one of them just flopped like a sack of rice and spread herself on the floor at the front door while waiting to be picked up by the Big Bluffer. Upset as I was I almost burst out laughing. Out of pity I made conversation with her. I think we found common ground. We both hate housework. A job I had landed myself into by choice and she by circumstance.


But I think she might have liked some cashew nut curry. If she had been a whole lot nicer and I had had a pleasant day it might have occurred to me to let her bring some home. Silly girl.


It was a sad and cloudy morning and I, groggy from sleep and exhausted from the previous day's encounter with Two Maids from my Nightmare, had taken photos of the cashew nut curry I had made on that day. 

Obviously, drunk from sleep, I wasn't focused and neither were these photos.  But a girl's got to do what a girl's got to do. No?


The recipe ~


This is a lovely dish. Sweet cashews in some curry sauce makes a most appetizing dish. I might also mention that I was inspired to make this after watching Anthony Bourdain's visit to Sri Lanka.


200 gm raw cashews
1 medium onion, sliced
2-3 pips garlic
1/2 inch ginger, sliced
1 T coriander powder
1/2 T cumin powder
1/4 T fennel powder
a pinch or two of tumeric powder
7-8 curry leaves


some black pepper, crushed
salt

1/4 cup thick coconut milk
2-3 T cooking oil


Pound the onions, garlic and ginger in a pestle and mortar till quite fine. 


Heat oil in a pan and saute the pounded ingredients until fragrant. Add the powdered spices and a little water, about 2 tablespoons, and saute until the  mixture turns a little darker and the oil seperates from the paste.


Throw in the cashews and stir to mix it into the spices. Add the coconut milk and bring to a simmer and let it simmer for about 20 to 25 minutes. Add salt in between. While doing so add some water or stock if the mixture seems to dry. There should be some sauce but not gravy. It a dry sort of curry. 


Sprinkle some crushed black pepper if you so desire. Serve with white rice. 


Note ~ You may add some sliced green chillies just at the end of the cooking and sprinkle some fried onions over the top just before serving.


Sunday, August 8, 2010

A CARROT CAKE 'CAKE'


A dear blogger friend Sarah Jane had sent me not one but four silicone WORD moulds all the way from the UK. As if that wasn't enough Sarah had included some sugar nibs and a rolling cookie cutter as well. What can I say? I was excited.... WOW and thank you Sarah Jane. I just can't wait to play with the sugar nibs and cookie cutter as well.

Sarah Jane designs moulds for SiliconeMoulds.com, a company that sells all kinds of silicon moulds. Not just for baking but also for chocolate making and soap moulding. If you visit her site you'll see moulds in a variety if shapes and sizes and some of them are really whimsical and fun. My kind of mould shapes. These moulds look fantastic! 


If you want to see some great recipes hop over to her lovely blog ~ siliconemoulds.blogspot.com :)) If you read my blog you might remember the Cherry Cupcake Financiers that I made a while back? Well... it was one of Sarah's fantastic recipes. 


I have never used or bought silicone moulds before. I was a little apprehensive at how the cake would hold up since the moulds were rather soft and rubbery while H kept asking me if I was sure it was for baking. Heh... Men.

What's good about about these moulds is that you could cut them up and seperate the letters, bake them seperately and make up your own word with them. So you're not stuck with just one word. Two birthdays coming up two new words to bake! Yay :)


I think you can bake pretty most any kind of cake in these word moulds but like all intricate moulds with defined edges and corners, silicone or not, a slightly dense cake would be best, just to ensure the edges come out nice and crispy sharp. And a good greasing with butter and flouring of the mould is a must-must. Just like their metal counterparts if these moulds are well greased and floured the cakes literally fall out of the moulds.

The letters are about 4 1/2 inches in length and about 1 1/2 inches in height each. Oh..and you can't get these moulds anywhere else except on SiliconeMoulds.com website. I believe these are the only word moulds being produced in baking world at the moment and it's pretty new.

I had used Smitten Kitchen's Carrot Cake recipe. It was absolutely delicious ~ moist, not too sweet and perfect.This is a cake that you would want to make. Always.


Here's the recipe ~ adapted from Smitten Kitchen

I halved the recipe and it was perfect for the word CAKE. I had also omitted the nutmeg, ginger and raisins.  


2 cups flour
2 tsp baking soda
1 tsp salt
2 tsp cinnamon
1/2 tsp nutmeg
1 tsp ginger
2 cups sugar
11/4 cup vegetable oil
4 large eggs
3 cups finely grated carrot
1 cup coarsely chopped walnuts
1/2 cup raisins


Whisk flour, baking soda, salt and spices in a bowl. Whisk sugar and oil until well mixed and add egg one at a time mixing well after each addition and once all eggs have been added whisk for another 3-5 minutes until the mixture is pale and light. Fold in flour with a spatula and then fold in carrots and walnuts and raisins if using.

I filled the moulds right up to the rim.


Bake at 170 C for 35-40 minutes if you're using a normal shaped tin or until a toothpick inserted in the centre comes out clean. I baked the word cake at 160 C for the first 10 minutes and at 170 C for the rest of the time. Test with a toothpick and if it comes out clean it's done. All in all I baked it for about 25 - 20 minutes.

Please visit Sarah-Jane's siliconemoulds if you would like detailed photographs and instructions on using these moulds.


Cream cheese frosting~

There is no exact measurement for this ... I used ~

About 250 gm cream cheese
About 1/4 cup heavy cream
About 80 gm gm icing sugar


Beat all together in a mixer and adjust according to taste and to the consistency that you prefer. Spread over cake.


Some tips on using word silicone moulds :
 

1. Grease the mould with your finger so that you can get right into the corners. Then sift some flour over the mould and  the best way to get the flour into all those corners would be to 'clap' the mould against itself over the kitchen sink. Tap out excess flour. It hardly takes any time at all. Quicker than I imagined it would be.


2. Scoop up the batter with a small plastic jug and pour the batter into the mould. You get less drip and smudges this way apart from it being quicker.


3. Lower the oven temperature by 10 degrees so that the cake will not mound too much. Through experience narrow or small moulds like loaf tins causes the cake to mound and crack at the top because of the small surface area. This can be avoided considerably in the word moulds by baking at a lower temperature at the beginning which avoids 'shocking' the batter into rising. 

4. Choose a slighlty denser and firmer cake to bake in the word moulds because the edges will be better defined when the cake is unmoulded.

5. Don't attempt to lift the mould off the tray while it is hot. Because the mould is flexible and the cakes still tender so you might break the cakes if you tried. Leave it on the tray until it cools half way through at the least. Wait until the cakes are COMPLETELY cold before turning out.

6. Unmould the cakes carefully pushing them out from the bottom of the mould. Turn the cakes with the mounded tops facing you.

5. Slice off the mounds with a bread knife just enough so you have a flat bottom so that the cakes sit evenly on the board. Turn the cakes over so that the bottoms become the top and the sliced tops become the bottom.


6. Wash the moulds in warm soapy water after use.


Tips on  decorating word cakes :

1. Use the smallest/narrowest spatula. 


2. Cover the cake with a thin film of butter cream first and place it in the freezer to firm up. Maybe 20-25 minutes or more. Don't worry if the cake shows through. Don't worry about frosting the crevices like the one in the letter A. Unless you're a little obsessed like me.


3. Coat with a second layer. Smoothen the sides with the small spatula or use a slightly larger one. Pipe squiggles over the top using a piping bag and a number 3 plain round nozzle. There is no need to decorate the sides unless you decide to sandwich two word cakes together in which case you will have tall sides.

4. Freeze the cakes again for a few minutes to an hour until the frosting firms up so the cakes can be  lifted with a spatula onto your plate or cake board and you can arrange the letter cakes any way you wish without messing up the frosting too much.


5. It would be pretty if the letters were arranged in a quirky and whimsical way.

6. Or you could frost each letter a different colour if you have all the time in the world. 


TIP : A quick way to decorate a word cake would be to dust some icing sugar over the top. It looks just as beautiful.Sarah-Jane did one here and it was beautiful.


Wednesday, August 4, 2010

BRINJAL IN DRIED SHRIMP SAMBAL ~ TERUNG MASAK SAMBAL UDANG KERING


Dried shrimps are one of the most flavourful ingredients to have around in the kitchen cupboard. It is pungent and like all pungent ingredients it is packed with umami, like bonito flakes, like fish sauce, like belacan etc. A dish becomes irresistible when pounded dried shrimps are used as a flavour base. The list of dishes for dried shrimps is endless...stir fried veggies, fried rice, fried noodles...as a sambal, as a filling, as a topping...hey-ho.....everything. 


Hub had just come back from a  trip to Kota Kinabalu in Sabah,  also referrred to as 'The Land Below The Wind' by the Suluks, a sea faring people from the Southern Philippines. So named because Sabah is located just below and lies just of reach of the merciless typhoons that hit and devastate parts of the Philippines every year. This name has been popularized by Agnes Keith's book, The Land Below The Wind.

Agnes Keith was an American born in Oak Park, Illinois. She married Henry G. Keith an Englishman who was appointed a conservator of forests and Director of Agriculture of North Borneo under the Chartered Company in the early 1900's.

Her chronicles of her life and unique experiences in the then  North Borneo as the wife of an English officer during the colonial era was submitted and won the prize in the non-fiction category in the 1939 Atlantic Monthly later to be published as a book named The Land Below The Wind. It received favourable reviews. Interestingly, one of her books 'Three Came Home' detailing the hardships and deprivations as POW under the Japanese became a bestseller and was turned into a motion picture.


Described by a friend ......"Mrs. AK has an unusual appearance, being six feet in height, very thin, with the stealthy lops of a red Indian. She dresses in startling and flamboyant fashion, in very bright colours while her hair is worn in two plaits,one over each shoulder, thus adding to a slightly Indian aura. " ~ excerpt from Wikipedia.


The bungalow in Sandakan, Sabah in which they spent many years as a family has been preserved by the state government.

In that sense Agnes Keith and Sabah have become inseperable just like what the best quality dried shrimps and the to-die-for whole, dried and salted red snapper is to The Land Below The Wind.


As I was saying, Hub had brought home a one kilogram packet of umami dried shrimps. Which is  a humongous amount but which I believe will be finished up in no time. Or ...perhaps not. I've got to give some away. Cholesterol my dear ...cholesterol.

This is what I made ~ Fired brinjals or eggplants in a dried shrimp sambal. Irresistible, to-die-for and totally...did I say  to-die-for? Yea....


The recipe ~


I had used the long brinjals or eggplants. They were sliced length ways and shallow fried. Then kept aside on kitchen paper while the sambal (paste, pesto)was being made. I also did not use belacan. After a frantic search in my cupboard I realized that I had run out of it. Waaaaaaaa.....

2 medium sized brinjals or eggplant
1/4 cup dreid shrimps, soaked in a little water to soften
1 inch square piece belacan (optional), slightly charred over a small flame
2-3 shallots
2 pips garlic
2 large red chillis 
2 dried chillis (optional) soaked in hot water for 15 minutes if using
1 lime
cooking oil
salt

Shallow fry the sliced brinjals in some oil until they get soft and cooked through. Drain on kitchen paper. Keep aside.


Pound dried shrimps, belacan, shallots, garlic, fresh chillies, dried chillies (if using) in a pestle and mortar until it becomes a fine paste. Salt may be added to ease the break down of the ingredients. But be careful of the amount of salt added because the shrimps and belacan are somewhat salty.


Pour *2-3 tablespoons of oil into a wok and saute the pounded ingredients until fragrant and until they turn a darker colour and looks slightly crusty on the surface. Another sign that it is done is when the oil seperates from the paste

* Add more oil if the mixture gets too dry. This dish is greasy.


Add salt to taste and a squeeze of lime juice. Lay the brinjals on a serving plate and scoop the of dried shrimps sambal over the top. Serve with freshly cooked white rice.


I'll be submitting this recipe for this month's Muhibbah Malaysian Monday. hosted by Shaz of Test with Skewer and 3 hungry tummies.


Sunday, August 1, 2010

DURIAN BUTTER CAKE


Warning to westerners : Stinking post ahead. Read at your own risk.

Durian season is here. I think. I'm no longer a fan of the durian so I don't keep track. I once was though until I decided to deprive myself of durian for some reason. I have not had durian for the last 30 years since. I know. For durian lovers that is the most disgraceful sin ever. Unforgivable almost. But I had my reasons.

So I'm repenting. A few nights ago I grabbed a few boxes because they were on at 50 per cent disconut at Jusco. Cheap. But not to eat directly. I had a recipe that I've been wanting to try. It comes from the lovely blog of Tracie of Bittersweet. Her mom's famous durian butter cake. Boy it's good. Because I have so much to repent for I also made durian butter or jam or whatever you would like to call it. 


I have yet to try it on toast if I can only stop licking it off the spoon. Everything stunk around here. In a heavenly stinking stunking kind of way that is.

I must be dreaming but I think I can smell it from the photo just by looking at it. Can you?

Anyway, please forgive me for not taking a picture of a sliced piece but I was in such a rush for an appointment that I forgot. It's too late now. 

But it was soft, moist and buttery and of course it stunk ~ In a heavenly stinking stunking kind of way. Just the way durian devils would like it.


The recipe ~ from Tracie of Bittersweet

I made two 4 inch cakes

250 gm butter 
250 gm SR Flour
200 gm sugar
4 eggs
160 gm durian pulp (I used 190 gm)
1-2 T milk

Preheat oven to 170 C.

Cream butter and sugar until light and fluffy. Add eggs one at a time and beat each time after each addition until well mixed and fluffy. Fold in flour and durian pulp and milk alternately until all the ingredients are used up. 

Pour batter into a 9 inch round pan that has been greased and lined. Bake for about 40-45 minutes until a toothpick inserted in the centre comes out clean. Let cool a few minutes beore turning out. Serve with the durian butter/jam if you have it.

Durian butter/jam ~

190 gm durian pulp
1/4 coconut cream
1 tap sugar 
a pinch of salt

Mix all together and warm it up on low heat stirring all the time for just a few minutes until everything comes together and thickens to a good spreading consistency. Eat.


For those who took part in my CSN giveaway please go here for the results. :)

LinkWithin

Related Posts with Thumbnails