Showing posts with label Vegetarian. Show all posts

Tuesday, August 2, 2011

FLOWER BUNS ~ SNAIL BUNS


I thought I could s'nail' this since arts and crafts has always been my forte but these flower or snail buns were quite a challenge. And chignons I have never made. Unlike Terri. So perhaps that explains why I was struggling. I almost didn't post these. Some of them looked ridiculously laughable. These were the best of the worst. N looked at me with a question mark on her face.

But I think they taste good. I'll know by sunset. I will have to re-heat them though. These are best eaten warm.

I have always loved Chinese steamed buns but especially buns with a spicy curry meat filling. Yes.... you cannot take the Malay out of me but there's always room for Chinese. And chocolate. And ice cream.

These would be good soaking up a curry I made last night. Oh. My. Yum. 


Terri was spot on with the recipe. I used exactly 200 ml of water and  I didn't need to add a drop more. I kneaded the pau dough in the machine until it didn't stick. I had no sticky problems. The dough was as good as a good dough could get. I too chose to use ordinary plain flour and not the fine, white special Hongkong pau flour. I find that buns made from plain four have more substance and flavour with a  lovely cream-ish hue. The white ones seem bland in comparison.

This is a recipe I'll have written out and blu-tacked onto the kitchen wall in front of my work table. Yes I will.


The recipe ~ from Terri of A Daily Obsession 


350 gm  plain flour or special Pau flour
1 tsp yeast
1 tsp baking powder
50 gm sugar
200-250 ml water
1 T vegetable oil or shortening


Sift flour and put into a bowl. Add all other dry ingredients including the yeast. Stir to mix. Add wet ingredients and knead on the machine until the dough is no linger sticky and can be pulled away easily from the dough hook.


If kneading by hand knead until smooth and not sticky. Place dough into a lightly oiled bowl and cover with a damp cloth.


Let rest for about 30 minutes (my dough needed about an hour).


Take dough out from bowl and divide into 50 gm balls or smaller, the size of golf balls). I made 40 gm balls of dough.


Take each ball and roll out into a small longish oval. Terri says about the length of your hand and 3-4 cm in width. Using a pastry scraper cut the dough lengthwise into thin strips about 1/2 cm thick or slightly thinner all the way. Brush the surface with vegetable oil lightly.


Pick up the strips of dough with both your hands (don't worry they won't fall apart unless you deliberately seperate them).


Twirl one end around your left thumb (if you are right handed) while pressing the end of the dough with your thumb and forefinger to anchor it. Continue twirling and covering the tips of your two first fingers and back around to your thumb again all the while gently stretching the dough with your other hand as you twirl. By now the dough would be twirled around most of your thumb and the top half of your first two fingers and looking like a cone or snail shell........hopefully.


Please do go over to Terri's blog to see her wonderful photographs. I had no one to ask to take photos while I was at it :(


When you reach the end of the strip tuck it in and under the base of the 'snail'. 


Place on 5 cm squares of baking paper straight into a steamer rack but do not place the rack on the steamer bottom yet. Let rest for 10 minutes while you bring the pot of steamer water to a rolling boil. Then place the steamer rack of buns onto to the steamer pot of boiling water and steam for about 4-5 minutes.

I used a bamboo steamer. So indispensable. Why? Go here.


Serve hot.


Monday, July 11, 2011

BANANA BITES ~ CEKODOK PISANG


I love my Malay cakes even if they are plain toads (kodok). These are authentic. There is no grated coconut meat in it, no baking powder is used and no egg at all....all of which would give these bites airiness, lightness, puffiness and turn them into dainty, too perfectly round, bland, made-over versions of the original toad bites.

Purists, however,  would swear by the original kampung (village) version which is crisp and chewy on the outside and soft, mushy and banana-ey on the inside. And quite toad-like in looks.....irregularly shaped, flat, heavy, ugly and greasy but absolutely to die for. I love my Toad Bites or Kuih Kodok.


Rice flour is added to the batter for a crisp and chewy skin, plain flour to hold the batter together and of course the mashed banana gives the inside the mushy and banana-ey goodness that we die for. I don't see why anyone would not love these. 

Anything greasy has to be good.  Kiddies especially love these.....imagine chubby little fingers pushing toady bites into chubby little mouths filling up those chubby little cheeks and chomping with their tiny teeth. Chomping on toady bites.....hands greasy...hands touching hair, hands touching clothes, hands touching furniture and their mommies.


The recipe ~

297 gm very ripe mashed bananas,  ( I used pisang berangan)
60 - 65 gm granulated sugar
4 T plain flour
3 T rice flour
1/4 tsp salt

Oil for deep frying

Mix mashed bananas and sugar with a wooden spoon. Stir in both flours and salt until combined.


Heat enough oil for deep frying in a pot. When hot or 180 C drop the batter in by teaspoonfuls. Let fry for about two minutes after which time the fritters would lightly golden, puff up and loosen slightly from the bottom of the pot. Agitate it a little so that it releases completely from the bottom of the pot and turn over to brown the other side. When the fritters are a deeper golden colour lift out and drain on two layers of kitchen paper to absorb excess oil. 


Continue to fry the rest in the same way. 


If you eat these hot or warm you will experience the lovely crunchiness and chewiness that the rice flour gives to the fritters. The crunchiness is lost when cold but it is still chewy and deliciously mushy and banana-ey inside.


Great served in paper cups to kiddies. 


Yes those cute animal picks are from Daiso ~


I am submitting this to Muhibbah Malaysia Monday.

Head over to Shaz of Test With Skewer for the round up.

Friday, May 6, 2011

A JELLY GIFT


I think this would make a lovely Mother's Day "gift"! A jelly presented with things inside. Namely fruit. It's sweet, it's pretty, it's a "gift". It's healthier than cake. It puts less calories on the hips and what nots.

Jelled orange juice packed with lychees and a few ruby red strawberries for accent. A golden glob of sunshine gift-wrapped.   


Here's Happy Mother's Day to all mothers. :) Trials and tribulations. Love and laughter. Gratefulness and gratification. What a life.

A Mother's Day....it's full of surprises! And then some ~


I used Sarah-Jane's unique silicone moulds from siliconemoulds.com. I have made HAPPY chocolate cake, carrot CAKE cake, Easter egg madeleines, plum financiers, brioche and some milk jellies using Sarah's moulds and each had turned out perfectly moulded every time. But 'gift' moulds are the first I've ever come across. 

The mould comes in a set of two in one. But if you wanted to use only one you could easily cut it in two. Which I didn't. Because it was too pretty in pink to be cut. 


The recipe ~

Agar agar makes an unwobble-ble jelly. I have never used agar agar in powder form before so I had no idea how much powder to put in. I scrutinized the packet and spied "10 gm .......800 ml water." I was only using about 1 1/4 -1 1/2 cups of juice. So I used about 5 1/2 teaspoons of agar agar. It turned out very firm. I would reduce a little next time.  I think I prefer slightly wobble-ble jellies. This jelly reminded me of a very firm mattress.

Gelatine makes a wobbly melt-in-the-mouth jelly. Agar agar would not melt in the warmth of your mouth. You'll have to bite it to get it down. We are texture obsessed..

I do prefer working with agar agar because it doesn't need refrigeration. I know for sure that it will set. And set very firm. So there is no need to be delicate or for your heart to stop when un-moulding it. 

I remember mak ciks (aunties) leaving trays of bright red agar agar on the kitchen table while they went around with their other kitchen chores. Almost immeidately the agar agar would start to set, get firm and solid. Then I would watch and hear them being cut with a scrunch using one of those copper zig-zag-gy knives and the jellies would be served in slabs. Very pretty!


Approximately ................

1  cups orange juice
1/2 cup apple juice
Sugar to taste (if juice isn't sweet enough)
about 5 tsp agar agar powder (or slightly less for a less firm jelly)

Some lychees and a few strawberries to fill

Warm juice, sugar and agar agar powder until sugar and agar agar powder dissolves completely. Pour a thin  1/4 inch layer of jelly into the mould and chill for few minutes, about 5 minutes until the jelly just firms up a little. Drop in the fruits gently. If the mould is small you can fill up with fruits to the top and pour in the rest of the jelly liquid. If the mould is larger do a layer of fruit at a time and chill in between for about 10 minutes each time. Take it out, scratch the surface with a fork a little to ensure that the next layer of jelly adheres. arrange another layer of fruit and pour on jelly liquid again and so on and so forth until you reach the top.


Monday, January 17, 2011

APPLE PIE PIZZA


You could say I started the new year off with a big slump. Not in a bad way. Just a lazy way. Too many New Years too fast makes me wonder whether I'm coming or going.

New Years  seem to be standing around every corner and jumping out at you these days. And before you've had time to be done with the old one you find yourself standing and talking to a new one. And wonder where the old one went.

Nevertheless, I made some of Jamie's pizza dough yesterday, rolled them out in discs, half baked them and stacked them in the freezer in plastic bags so that FMs could make their own pizzas when they're hungry.

But this morning I made a sweet pizza. A quick apple pie pizza. Apple slices cooked in a skillet with a knob of butter and some brown sugar, topped the pizza discs with them and gave them a quick basking in the oven. 


In what has seemed a long time I had a quick, guilt free, crusty apple pie for breakfast. It wasn't bad at all.

The recipe ~


Pizza crust recipe here (JO's of course). They are ever so easy and perfectly crusty!


Apple pie apples ~

4 granny smiths, peeled, cored and sliced into rounds (about 1/4 inch thick slices). Macerate the slices with a about 1 T of lemon juice and 1 1/2 tsp of cornflour. Mix well and leave aside.


A knob of butter ( a bout 1 T)
1/4 cup brown sugar

some apricot jam
a pinch of cinnamon
a pinch of salt
2-3 T of water

Melt butter in a skillet. Pour in the sugar and stir until sugar melts. Throw in the macerated apple slices and stir gently to coat the apple slices well. Cover and allow to simmer for about 7-8 minutes or until the apples are tender as you would like them to be. Add water if too dry.

Add a pinch of cinnamon and a pinch of salt. Stir in to incorporate. The caramel from the butter and sugar should be thick.


Top two 6 inch pizza discs with the apple pie apples and dot them with small knobs of butter randomly.


Bake in a 180 C oven for about 20 minutes until the discs are golden brown at the edges and crispy and the apple topping bubbling.


I brushed the tops with some apricot jam to make them glowy, photogenic and glazey.


Saturday, October 30, 2010

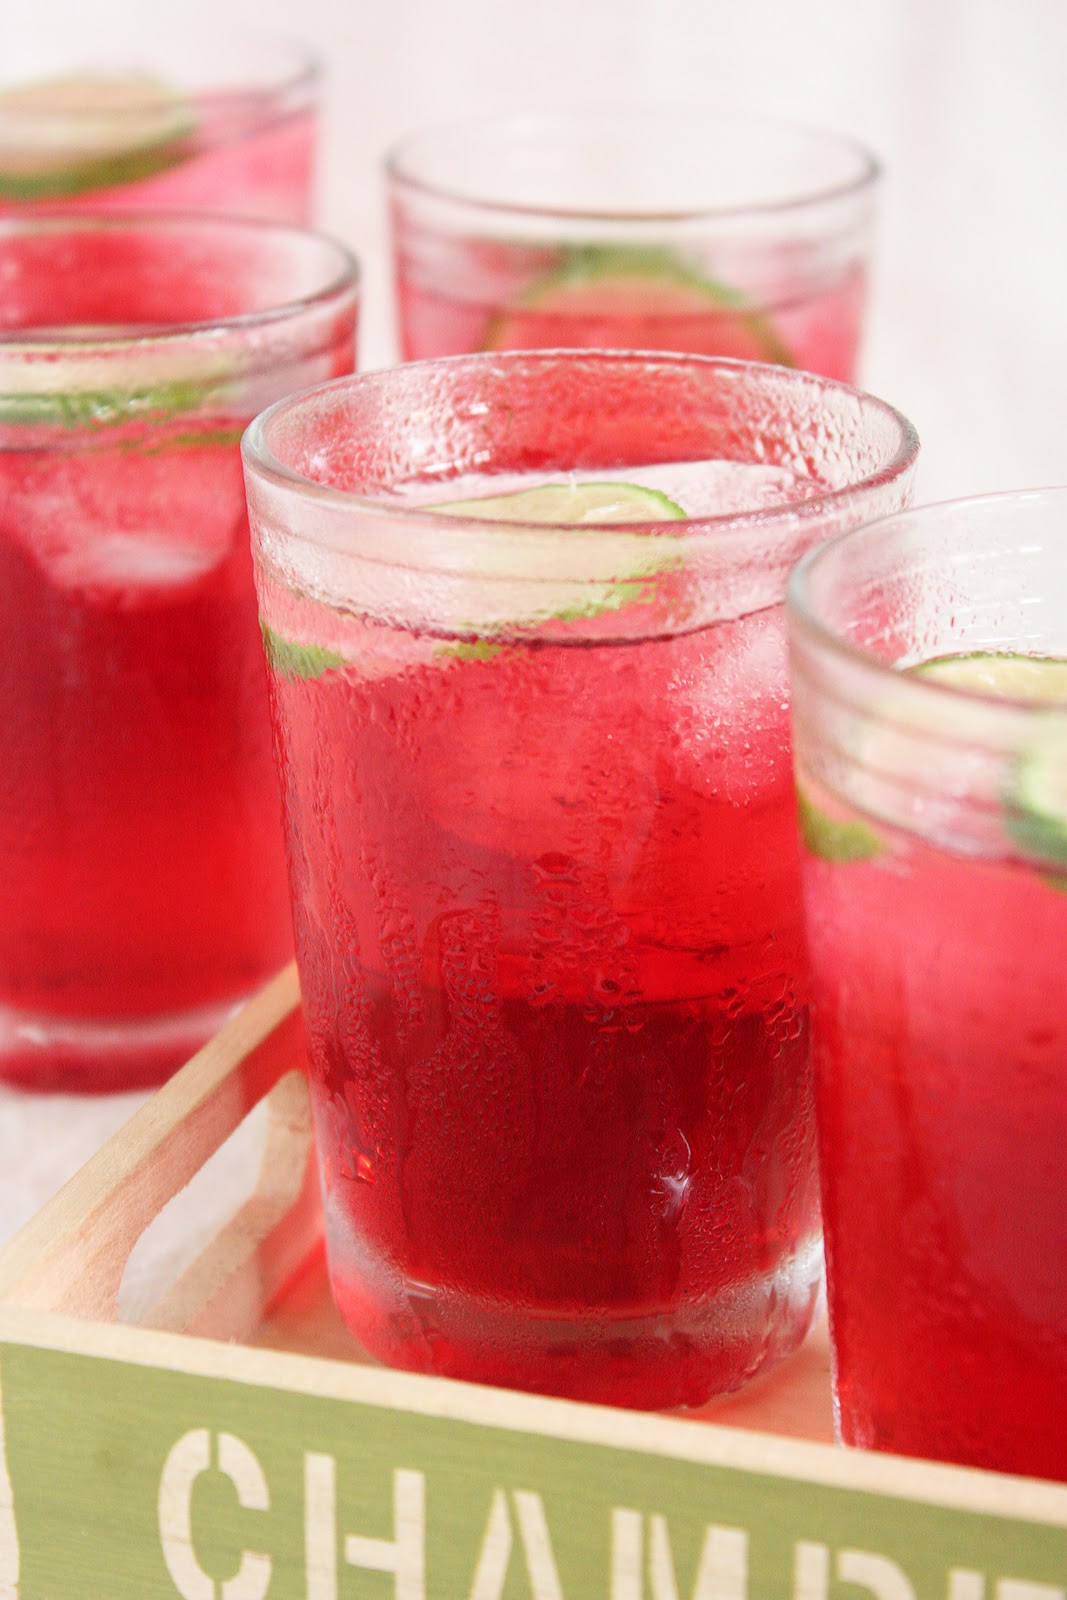
A ROSELLE CORDIAL ~


There is something about a crimson coloured drink that makes it desirable and irresistible. 

I knew I had to make this when I saw it on The Hungry Caterpillar. The Roselle cordial is made from the sepals of the Roselle flower. A species of the hibiscus which is a plant native to the Old World tropics. It is of a deep plum colour, fleshy and crisp in texture, bizarre, kinky, alien-like, seemingly ready to scamper, creep, plunge, squeak, squeal and rule the world through my poor little chocolate addicted body.


H thought they looked weird, and winced when I offered him the cordial. I looked at him as adamantly as I was allowed to and, to my surprise, he relented and took a sip. Then he waved the half full glass of roselle out of my reach. I smacked his arm with my paw. As hard as I was allowed to. We grappled. We drank. We were in ecstasy and in joyful worship. Of Rosella. (Dionysus... move over)


Obviously it passed the test. So now it's bottled. Like a Genie.

It has a lovely flavour that hovers between a grape juice and a Ribena (a blackcurrant cordial). It has a slight tang to it too. It contains lots of vitamins and goodness-ess. Then I gave some to my mother.


Cordials are popular in this hemisphere. They are very sweet concentrated fruit flavoured syrups that need to be diluted with cold water, topped with ice cubes and then served.  In short, it contains copious amounts of sugar. It's the poor man's alternative to fruit juices. They are very refreshing.


The seeds found inside the sepals contain natural pectin and if these roselle sepals are to be cooked into a jam the seeds are boiled seperately in some water, drained, the seeds discarded and the gel like liquid that remains behind is added to the boiled sepals-sugar mixture to give it the final gel-like quality of jam. Fascinating.

PS ~ What a lovely and natural way to color cakes and icing.
The recipe ~ an approximation ~
300-350 gm roselle sepals
3 cups of granulated sugar
5-6 cups water

Rinse rosella sepals until clean. Drain. Pluck the sepals and remove all the seeds. 

Place water in a pot. Add sepals and bring to a boil and then a medium simmer for about 8- 10 minutes. The water will turn crimson immediately. Add sugar and simmer again until the sugar dissolves. Give it a stir. When sugar has dissolved and the syrup is a gorgeous crimson drain through a sieve and discard the sepals. 

Cool and store the syrup in a sterilized bottle.

To serve ~  

Pour about an inch and a half of the Rosella syrup into a glass and then fill up to 3/4 way with chilled water. Add ice cubes if you like. Taste for sweetness. Add more of the syrup if not sweet enough or more water if too sweet. Add a squeeze of lime and some slices if desired. Drink and be refreshed. 


It's a beautiful and gorgeous drink. How could one resist ?

Friday, October 22, 2010

RED & YELLOW WATERMELON GRANITA


I know....... summer in some parts of foodie world is over. But in my world ~  summer is forever. 

So there is nothing like an ice cold headache-inducing water melon granita to keep those heat waves at bay. This was just so refreshing that when my daughter and I mouthed the first few scoops of ice cold crystallized melon juice aka as granita while watching tv the heat outside just seemed to dissipate into a mirage-y blur and I felt transported to several degrees below 100. 


It was a continuous effort between cooling down and an ice cold headache. At times it was like my brain was being flashed frozen and the next minute relieved of it. It was a foodie's fight against nature. As hard as that may sound I would do granita again and again if the heat keeps up. Rain? Come again? Pretty please?

Of course granita turned to pleasant slush afterwards and I wished I had one of those big fat drain pipe straws then. Slurpy slurp.


I used red and yellow seedless water melon for these granitas. Since the watermelon was so sweet I cut it down with a few squirts of lemon juice. While I was at it I chopped some mint and threw it into the red watermelon slush/soon to be granita.  Gosh it was so good. These granitas.

So......

When you're feelin' kinda hotta 
Grab an ice cold and crunchy granita.


The recipe ~ serves many or when summers are forever

1 red watermelon
1 yellow watermelon
Juice of 1 or 2 lemons, if desired
pinch of sea salt
some chopped mint, if desired 

Scoop out the red watermelon meat. Place in a blender and blitz. Add a pinch of sea salt, lemon juice if desired. Swish and pour into a tub and when half frozen take out from the freezer and agitate it with a fork. Do it a couple of more times until you get granita according to the texture that pleases you. Scoop granita into individual glasses, layering the red and yellow granitas if you fancy, garnish with a sprig of mint and serve yourself and others. Best served when the sun is relentless and totally beating down on you. Mmm-hmmm. ~ Cooool ~

Ditto for the yellow watermelon granita.


Photographing these granitas was a nightmare. They slushed on me.

Monday, October 11, 2010

CREAMED CORN ~ CHUCK'S DAY OFF


 What would we do without passion? I suppose we would exist simply because we do. What kind of persons would we become? Without passion, without desire, without wants that rise above needs and necessities? What kind of persons would we become if we denied ourselves some space and self interest? What kind of persons would we be if we exist wholly for the service and for the pleasure of others or of something? What kind of persons would we be if everything we feel, think and do becomes a duty? Becomes controlled?

We would be persons without passion. We would be mechanical. We would be essentially inhuman. We would live a life devoid of desire, a life lacking of love, an existence empty of empathy and most of all we would be creatures without quirks and impulses, without intuition, without sensibilities, without meaning and without life.

Therefore I quirk. Therefore I make no excuses for impulses that make me do or say or write nonsensical things at nonsensical moments with nonsensical excuses. Sometimes. For making nouns verbs or verbs nouns. For thinking aloud. For clowning around. For making creamed corn. For stringing nonsensical sentences that have no meaning singly or apart. For using words like singly. For following my mind into it's crevices and it's dark turns, for squishing it here and there to test its limits, for agreeing to boggle myself and others, for letting it flow, for letting it go, with the flow, for letting it work without me or me without it. Like when I made creamed corn. A mindless recipe by an impassioned chef ~ Chuck.


Gapped-toothed, springy as a lamb and earnest - Chuck Hughes, with a holey moley basking on his cheek. He made a mindless creamed corn, passionately, and made me desire it too. It was zealously creamy, savoury and delicious. It was passionately umami-ed.


Fresh raw corn is sweet and crunchy and I love nibbling at it raw. The sugar in the corn is sensitive to temperature. So in order to keep the sugar as sugar, buy corn still in their husks, refrigerate them (in their husks) as soon as you arrive home otherwise it will turn to tasteless starch if you leave it lying around too long in a warm room.


Another way I prepare corn is to steam them (shucking just before putting them into the steamer when the water comes to a rolling boil), when cooked, I swipe butter over the cob while still pretty warm, sprinkle some salt all over and sink my teeth in. Juicy. The best. But whichever way you eat corn it's best if it's sweet. So buy fresh with the husks on and keep cool (pun not intended).

Here's the recipe by Chuck Hughes ~


3 ears corn 
1 cup whipping cream
1-2 T butter
Coarse salt
freshly ground black pepper


Husk and slice of the corn off the cob. Place in a medium pot. Add 1 cup of whipping cream. Bring to a boil and then simmer for about 10 minutes or until the sauce thickens, is reduced by half and the corn kernels have plumped up.


Add the butter, salt and pepper. Serve. Juicy!

The result was utterly still sweet corn in a delicious creamy sauce. The best creamed corn I have ever tasted. The family just loved it. Thanks to Chuck and his grandma.


PS ~ The photographs were taken at different times of the morning. I had a hard time. 


Dear Sun, Clouds....dear God,  Peek-a-boo is not fun.


Wednesday, August 18, 2010

GARLIC GINGER CHILLIE HOT SAUCE


Nothing fancy here. It's just a garlic ginger chillie hot sauce. A chicken rice hot sauce. All you need is a blender and a swoosh and it's done.

Ju made this exact sauce a couple of days ago as well. I'm not surprised if we had made and photographed it on the very same day. We share the same vibes. I believe that this is the third time we've made similar food and posted it within a whisker's post of each other's. It's one of those strange but true occurrences. 


This hot sauce is great with steam boats, chicken rice, stir fried noodles, rice, soups, as a dipping for fritters. Anything and everything I suppose. Whatever makes you happy and whenever your palate needs a bit of a kick.

Its kind of sour and spicy with a very subtle tinge of sweetness to it. Very very very appetizing.


The recipe ~


10 chillies plus some/many bird's eye chillies if you like
6-7 pips garlic, peeled
1 inch ginger, peeled
1/2 cup apple cider vinegar
1 T sugar
salt to taste


Wash and ch0p chillies into chunks. De-seed them if you wish. Put chillies and everything else in a  blender and blitz until it becomes a thick sauce. Add salt to taste. Store in a jar and better still in the refrigerator.

I am submitting this to Muhibbah Malaysian Monday hosted by Shaz of Test with skewer and 3hungry tummies


IMG_3063contrastsmtshpn

Friday, August 13, 2010

CASHEW NUT CURRY


If only maids were made in heaven I would have been a rested and happy woman in a newly cleaned and sparkling home. But no. I had to have two of the most incompetent and obnoxious maids delivered to my door yesterday. I was bluffed into believing that they were well trained and experienced. Silly me.

At the end of each explicitly explained task they stood and wavered looking extremely disgusted. I don't blame them. That is why I hire maids. Duh.

They grumbled and probably swore their way through the housework for almost three hours while I attempted to curb and guide them into some form of what I thought were logical and common sensed tasks. I think my eyes glowed.


After three hours when the job was 'done' and the house somewhat less than sparkling one of them just flopped like a sack of rice and spread herself on the floor at the front door while waiting to be picked up by the Big Bluffer. Upset as I was I almost burst out laughing. Out of pity I made conversation with her. I think we found common ground. We both hate housework. A job I had landed myself into by choice and she by circumstance.


But I think she might have liked some cashew nut curry. If she had been a whole lot nicer and I had had a pleasant day it might have occurred to me to let her bring some home. Silly girl.


It was a sad and cloudy morning and I, groggy from sleep and exhausted from the previous day's encounter with Two Maids from my Nightmare, had taken photos of the cashew nut curry I had made on that day. 

Obviously, drunk from sleep, I wasn't focused and neither were these photos.  But a girl's got to do what a girl's got to do. No?


The recipe ~


This is a lovely dish. Sweet cashews in some curry sauce makes a most appetizing dish. I might also mention that I was inspired to make this after watching Anthony Bourdain's visit to Sri Lanka.


200 gm raw cashews
1 medium onion, sliced
2-3 pips garlic
1/2 inch ginger, sliced
1 T coriander powder
1/2 T cumin powder
1/4 T fennel powder
a pinch or two of tumeric powder
7-8 curry leaves


some black pepper, crushed
salt

1/4 cup thick coconut milk
2-3 T cooking oil


Pound the onions, garlic and ginger in a pestle and mortar till quite fine. 


Heat oil in a pan and saute the pounded ingredients until fragrant. Add the powdered spices and a little water, about 2 tablespoons, and saute until the  mixture turns a little darker and the oil seperates from the paste.


Throw in the cashews and stir to mix it into the spices. Add the coconut milk and bring to a simmer and let it simmer for about 20 to 25 minutes. Add salt in between. While doing so add some water or stock if the mixture seems to dry. There should be some sauce but not gravy. It a dry sort of curry. 


Sprinkle some crushed black pepper if you so desire. Serve with white rice. 


Note ~ You may add some sliced green chillies just at the end of the cooking and sprinkle some fried onions over the top just before serving.


Friday, June 18, 2010

MUNG BEAN FRITTERS ~ KUIH KASTURI

 
Afternoon tea is history. It went out of fashion some 30 odd years ago. What a pity because that is, to me, the most fun meal. It is a dessert meal or a snack meal. It was a sit down meal. It was either cakes, fritters or simple fried noodles. Nowadays it's packaged biscuits ~ Khong Guan cream crackers, Marie Biscuits ~ all dunked in hot milk tea or Milo or commercial buns from the nearest bakery eaten 'on the go'.. No one has the time to sit down as a family to enjoy afternoon tea anymore. No family is smiling and conversing at 4 o'clock anymore.


I doubt my children have any idea that afternoon tea was an actual sit down family meal. Yes I'm guilty of it's extinction too. But I'm not alone. Tuition got in the way. Traffic got in the way. Malls got in the way. Businesses got in the way. TV got in the way. Why, afternoon tea got in the way of the British too. Life had to go on. And so it did.


It's no wonder that our tea time kuih(s) have become an all day long snack food. Tea time has disappeared. But not the hunger for the various kuih though. Besides, men get up to feed at midnight. Old fashioned mung bean fritters fill that new hunger. I don't recall my dad or brother being up at midnight hunting for food. But of course World Cup Football was never shown Live either. These bean fritters are one of H's favourite kuih. They are delicious warm.


The Recipe ~


300 gm green mung beans
1/2 dark brown sugar or granulated palm sugar
3 or 4 or  T plain flour
pinch of salt
water


Batter :


1 cup plain flour
1/2 cup rice flour
pinch of salt
1/2 tsp baking soda
enough ice cold water


Place mung beans in a fairly deep pot. Cover with water completely, the water level about an inch and a half above the surface of the mung beans. Bring to a boil and then lower flame to simmer. Cook until the beans are tender, have broken up and until the beans have absorbed all the liquid leaving only a mush of beans in the pot (very much like cooking rice by absorption). Watch the pot carefully towards the end so that it doesn't burn. Transfer the mush onto a flat plate to cool it down completely.*

When the boiled beans have cooled down completely transfer to a medium bowl and add sugar, flour and a pinch of salt. Adjust for sweetness if you like it sweeter. Mix thoroughly until it becomes pasty and then shape into patties about 2 inches in diameter.


Batter :


Mix all dry ingredients together. Add cold water slowly and stop until you have achieved a nice coating batter.


Heat up a pot of oil until hot. Dip the bean patties in the batter  one by one and fry until a light golden brown and crispy. Serve warm or at room temperature. Enjoy.

* It's important that the cooked beans cool down completely so that when the sugar is added it will not melt and make the bean mixture too soft and sticky to handle. Some recipes call for grated coconut instead of flour to firm up the mixture enough to handle and to taste. I didn't have any.


LinkWithin

Related Posts with Thumbnails